Skip takeout and make this sweet and sour chicken recipe at home! Made with crispy pan-fried chicken coated in a sweet, tangy sauce then baked. This family favorite is the perfect weeknight dinner.

Sweet and Sour Chicken Recipe
I am so excited to share this sweet and sour chicken recipe that is always a huge hit each time I make it. This takeout favorite is definitely one for your “recipe file” just like cashew chicken, crockpot beef and broccoli and baked teriyaki chicken.
The homemade sweet and sour sauce is what really takes this recipe over the top. If you’re in a hurry, you could always use store-bought too. But making it homemade makes it extra delicious!
You’ll also love my PF Chang’s orange chicken recipe, chicken chow mein or honey sesame chicken recipe!
Recipe Ingredients
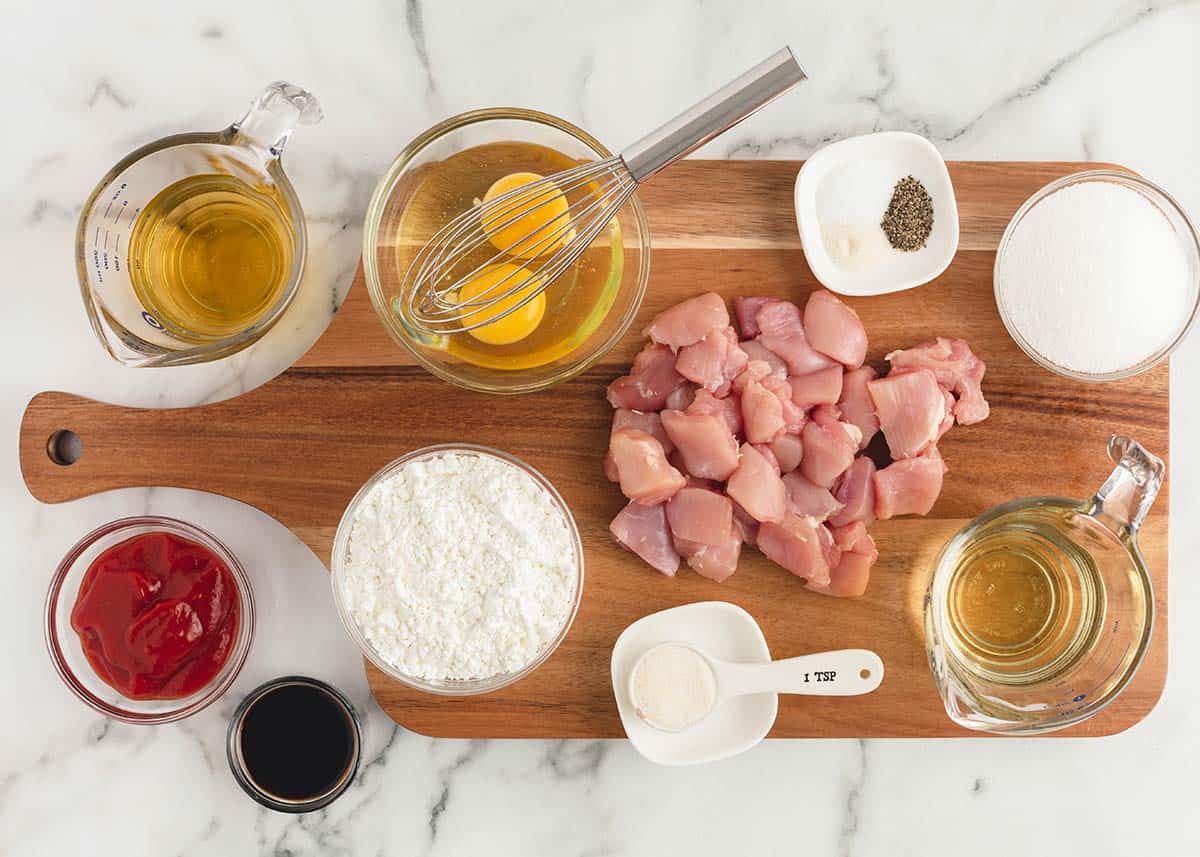
For your sweet and sour chicken and sauce you will need this list of simple ingredients!

Find the full printable recipe with specific measurements below.
- Chicken: You will need 1 ¼ pounds boneless skinless chicken breasts or thighs, cut into bite size pieces.
- Seasonings: Kosher salt, pepper and garlic salt.
- Cornstarch: To help create a crispy coating.
- Eggs: Whisked eggs will also help create a crispier texture for the chicken.
- Canola oil: Vegetable oil or olive oil can also be used.
- Sweet and sour sauce ingredients: Granulated sugar, rice vinegar, ketchup, soy cause and garlic salt.
Substitutions and Variations
This recipe is perfect for when we’re craving Chinese restaurant takeout. I love that we can make it at home and it’s even more delicious.
- Type of chicken: I prefer boneless, skinless chicken breast, but chicken thighs would also taste delicious.
- Vinegar: Distilled vinegar will work if you don’t have rice vinegar on hand.
- Add-ins: Add in extras like diced pineapple or vegetables like green bell pepper just like you may find at your local restaurant.
- Sauce swaps: You can use honey instead of sugar or apple cider vinegar instead of white. Love heat? Add a sprinkle of red pepper flakes or sriracha.
- Garnish: Add chopped green onions on top before serving. You could also sprinkle on some sesame seeds for a nice finishing touch!
How to Make Sweet and Sour Chicken

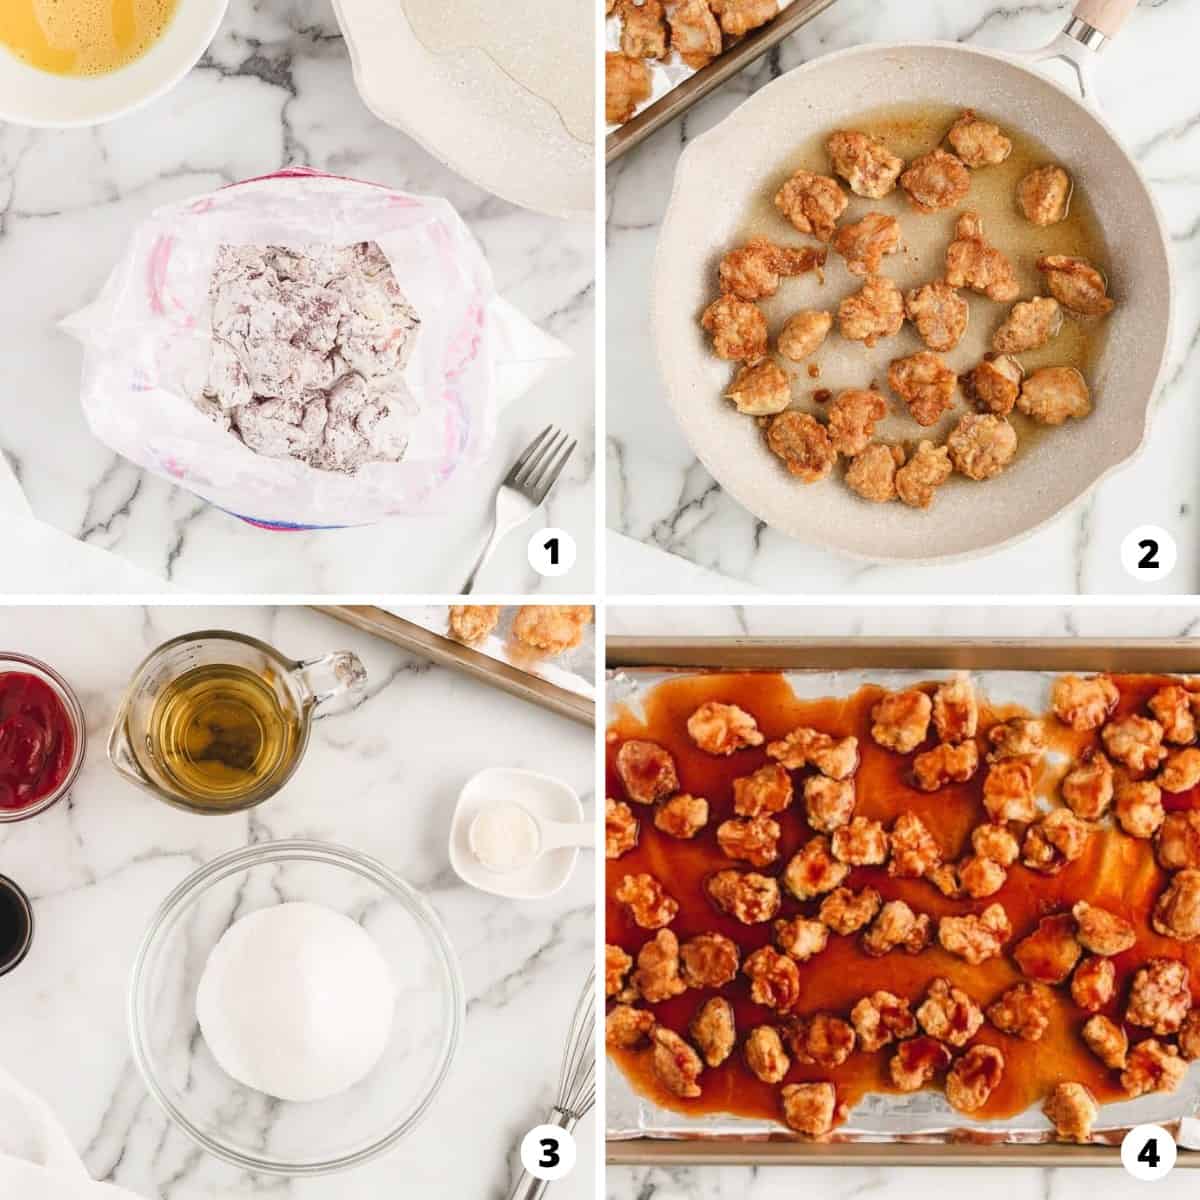
- Coat chicken: Add chicken pieces, corn starch, salt, pepper and garlic salt to the bag and shake until the chicken is evenly coated. This will be your ‘batter’.
- Pan fry chicken: Heat some of the oil in a large skillet or frying pan over medium-high heat. Dip chicken in the egg mixture and place into pan in an even layer. Fry both sides of the chicken. Dispose of the burnt oil and then heat up the rest of the oil to finish the chicken.
- Make sweet and sour sauce: In a medium size bowl, whisk together all of the ingredients for the sauce.
- Bake chicken: Pour the sauce over the chicken or toss to coat and bake for 20 minutes. Flip chicken to evenly coat it with sauce and then bake for an additional 15-20 minutes.
Expert Tips
In order to get the perfectly crispy chicken each time, follow these tips!
- Cut evenly. Dice the chicken into similar-sized pieces. You want them to be bite-sized, about an inch or so. This helps them cook evenly in the pan.
- Hot oil: test if the oil is hot enough, splash a little water on the oil. If it pops, it’s ready. Using a splatter guard can help with hot oil splatter and I advise to use tongs and an oven mitt.
- Cook in batches. Don’t overcrowd the pan! This is an easy mistake to make, but makes a big difference. When frying the chicken, Icook it in two batches so that there’s enough room on the skillet.
- Fry, then bake. There’s two steps to make this recipe. After frying the meat in the breading, you’ll then bake the chicken in the oven with the sauce poured over top. The oven helps get the exterior crispy while the sauce is caramelized on top.
- Double the sauce: Double the sauce to have extra for dipping. You can always use any leftover sauce to make this sweet and sour meatballs recipe.

FAQs
Yes! Prep the chicken and seasonings ahead of time. Use a zip top bag for the chicken for easy clean up. You can also make the sauce ahead, store it separately from the other ingredients.
Yes! One cup of pineapple chunks could be added when you bake the chicken.
Yes, you could add chopped bell peppers (red bell pepper, yellow or orange), onions or broccoli.
Serving Suggestions
Our favorite way to serve this dish is with steamed rice and vegetables, although if I have time this pineapple fried rice recipe pairs really well, too!
- White or brown rice
- Fried rice
- Steamed vegetables
- Chow mein noodles
- Homemade egg rolls
- Cream cheese wontons or crab rangoon

Storage
- Store: Store leftovers ian airtight container in the refrigerator for 3-4 days. If you have made it with rice, store that separately. Reheat in the microwave until warm.
- Freeze: You can also freeze leftovers for up to three months. Thaw in the refrigerator then reheat in microwave or in a covered dish in the oven at 350°F until warmed through.
Craving more Chinese takeout recipes to make at home? Try this easy sesame chicken, Kung pao chicken, general Tso’s chicken or veggie beef ramen!
More Asian Inspired Recipes
Browse allHUNGRY FOR MORE? Subscribe to my newsletter and follow on Facebook, Pinterest and Instagram for all the newest recipes!

Sweet and Sour Chicken
Video
Ingredients
For the Chicken:
- 1 ¼ pounds chicken , cut into bite size pieces
- ¾ cup corn starch
- ½ teaspoon Kosher salt
- ¼ teaspoon pepper
- ¼ teaspoon garlic salt
- ½ cup canola oil
- 2 large eggs , whisked
For the Sweet and Sour Sauce:
- ½ cup granulated sugar
- ½ cup rice vinegar , distilled or apple cider vinegar will work too
- ⅓ cup ketchup
- 1 Tablespoon soy sauce , or coconut aminos
- 1 teaspoon garlic salt
For serving: Cooked rice and broccoli and/or carrots, sliced green onions
Instructions
- Preheat oven to 325°F. Line a rimmed baking sheet with foil. Set aside.
- Place the chicken, corn starch, salt, pepper and garlic salt in a large ziplock bag and shake until the chicken is evenly coated.
- Heat 1/4 cup oil in a large frying pan over medium heat. Dip the chicken in the egg mixture and place in the frying pan with a fork. I did half the batch first. Fry both sides of the chicken for about 2 minutes a piece and place chicken on the pan. Dispose of the burnt oil and then heat up the rest of the oil and finish the chicken.
- In a medium size bowl, whisk together all of the ingredients for the sauce. Next, pour the sauce over the chicken and bake for 20 minutes. Pull the chicken out and flip the chicken to evenly coat it with sauce. Then bake for an additional 15-20 minutes.
- Serve with steamed rice and vegetables. Enjoy!
Notes
- To test if the oil is hot enough, splash a little water on the oil. If it pops, it’s ready.
- Double the sauce if you’d like extra for dipping the chicken in.
Nutrition
Nutrition provided is an estimate. It will vary based on specific ingredients used.
Did you make this recipe? Don’t forget to give it a star rating below!


People always label their recipes as “better than takeout,” but this one… it legitimately is. The sauce can’t be beat! I make this for my family at least once a month. Highly recommend!
Thanks so much for your comment and review, Amanda! So glad it’s a hit with your family. The sauce is my favorite part too :)
One of my family favorite meals!!! We love it.
Yay! So glad that it’s a family favorite :)
WOW, MADE IT FOR SUPPER TONIGHT AND IT WAS EXXCELLENT, COULDN’T WAIT FOR SUPPER AND DUG INTO IT AS SOON AS IT WAS READY. I CAN SEE US HAVING THIS OFTEN.
I’m so happy you loved the recipe, Gloria! Thanks for your comment and review :)
Very yummy. Takes some time with all the steps, but worth it. I love how the chicken gets sticky baking in the sauce.
Me too! That sticky sauce is my favorite :) Thanks for your comment and review, Shalyce!
I’m wondering if this can be made in the Ninja Foodie on air fry and then on the bake feature? Would you air fry on maybe 390 and bake at 350 for the same amounts of time? Regardless, we are definitely trying this!
I haven’t tried, so I’m not sure. If you give it a shot – let me know how it goes!
My family loves sweet & sour chicken but we don’t want to get takeout all the time so this recipe is perfect!
My chicken turned out perfect and crispy! Thanks for all the great tips. This is going into our regular meal rotation.
This awesome! I’ve made it several times and the whole family loves it!
I’m so happy to hear your family loves it!
This is my family’s favorite chicken !! Super easy and taste so yummy just like your eatting at a Chinese restaurant. Definitely make this one hands down the best
This recipe is so much better than the take out restaurant Sweet and Sour Chicken. It looked intimidating at first but really is easy and quick to make and the flavor is amazing! This is now in our regular rotation of meals.
I’m so happy to hear it’s on your rotation now! Thanks for leaving a comment and review Stephanie!
My husband doesn’t want any sauce so I cooked it on the stovetop & kept separate but they both were good & is a good & quick meal
Good to have a meal that normally wouldn’t be safe for our dairycorn/soy free family diet. I was able to swap Arrowroot for the cornstarch and Coconut Amnios for the soy sauce! It was fantastic.
I must try this for fathersday
I hope you enjoy! :)
very good
I made this again tonite and it was so good , so glad I found it x
I’m so glad you enjoyed it!
How do I copy this recipe.
Hi Kathleen! If you click “print recipe” it will pull up a page that you cacn print easily. :)
I have been on the lookout for a good sweet and sour chicken recipe – I’ll have to give this one a try!
Could i flash fry the chicken pieces, refrigerate, and bake them the rest of the way the next day?
It may change the texture a bit, but that should work!
Love how easy this recipe was & it turned out absolutely delicious!