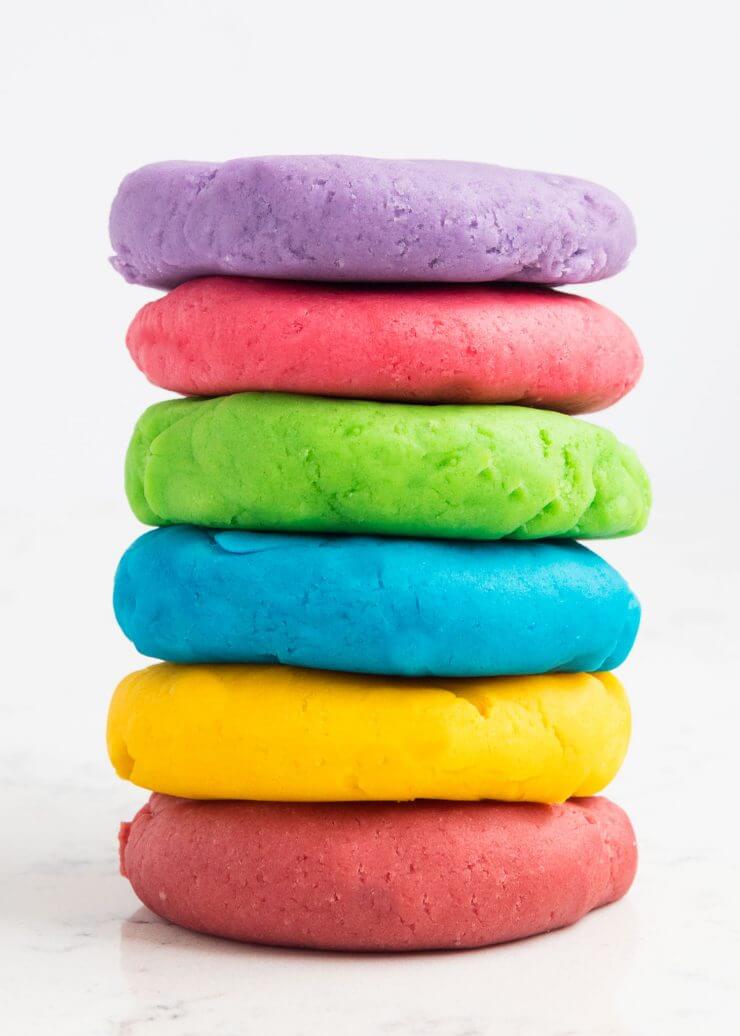
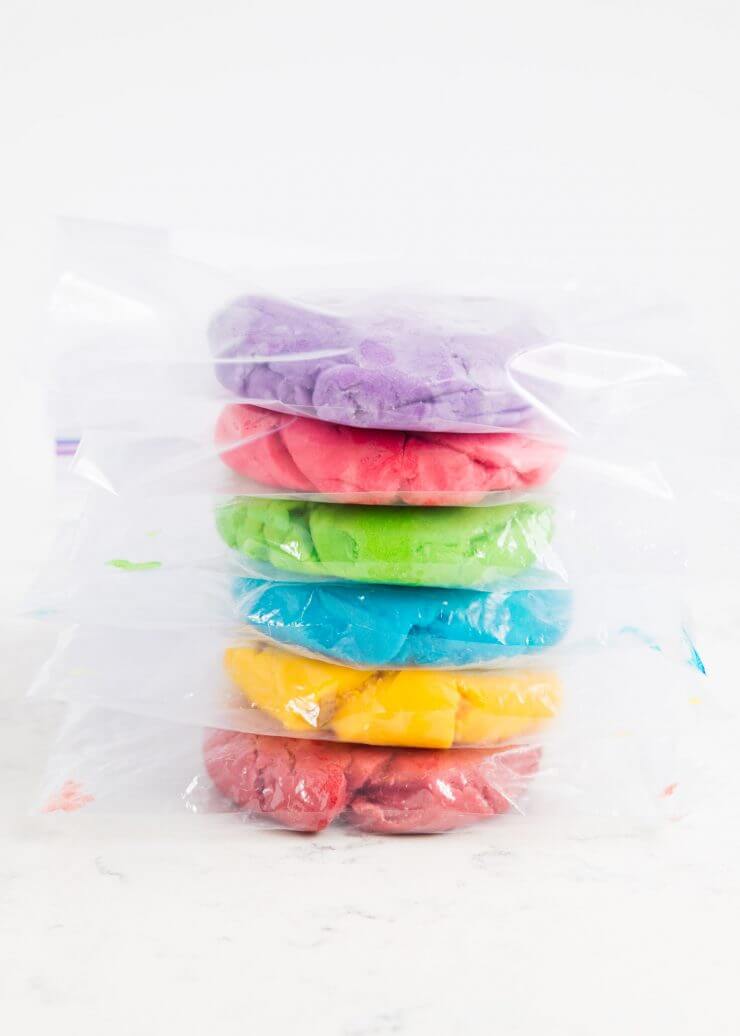
The BEST homemade playdough recipe – make in less than 5 minutes for under a $1 and have it last for months! It is so soft and squishy and cuts perfectly with cookie cutters.
Favorite Kids Activity
One of my kids favorite activities is playing with play dough. It is the perfect indoor activity for when it’s raining, too cold or too hot. When the weather’s nice we’ll even take it outside on the porch. My kids (age 8, 6 and 2) ALL love playing with play dough. My son pretends like he’s outgrowing it, but whenever my girls start playing with it, he always ends up joining in on the fun. I usually give them a few different colors, a mini rolling pin, some cookie cutters and let them go to town. I love seeing their imagination work.
Why is this the best homemade playdough recipe?
- It is SUPER soft and squishy, but doesn’t stick
- The play dough lasts for months in a zip top bag
- It is inexpensive to make
- It makes enough for 4-6 kids
- You can add different colors and even scents to customize your dough
We love making our own play dough, because it is so much softer (and cheaper) than the store bought stuff. I find it also lasts longer as well. Over the years I’ve tried dozens of recipes and this one here is the best playdough recipe out there! I got it several years ago from my son’s preschool teacher and figured I better post it to my blog so I don’t have to keep searching for it. At their preschool, the parents take turns making the play dough a different color each month and once I used this recipe, I haven’t looked back. I have slightly adapted the original recipe over the years. The main thing that I have done is cut down on the salt, as I found it keeps the dough extra soft for months!
How to make playdough
Playdough ingredients:
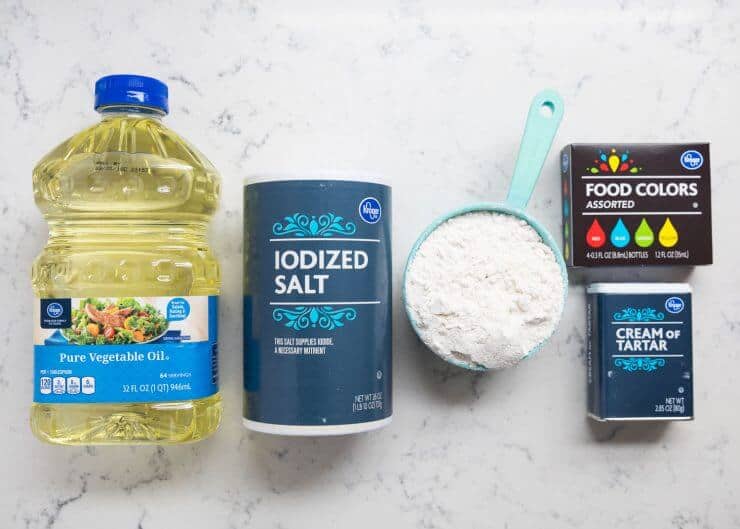
- 2 cups all-purpose flour
- 3/4 cup salt
- 4 teaspoons cream of tartar
- 2 cups lukewarm water
- 2 Tablespoons of vegetable oil (coconut oil works too)
- Food coloring, optional (I like Wilton gel food coloring or AmeriColor gel)
- Quart sized bags
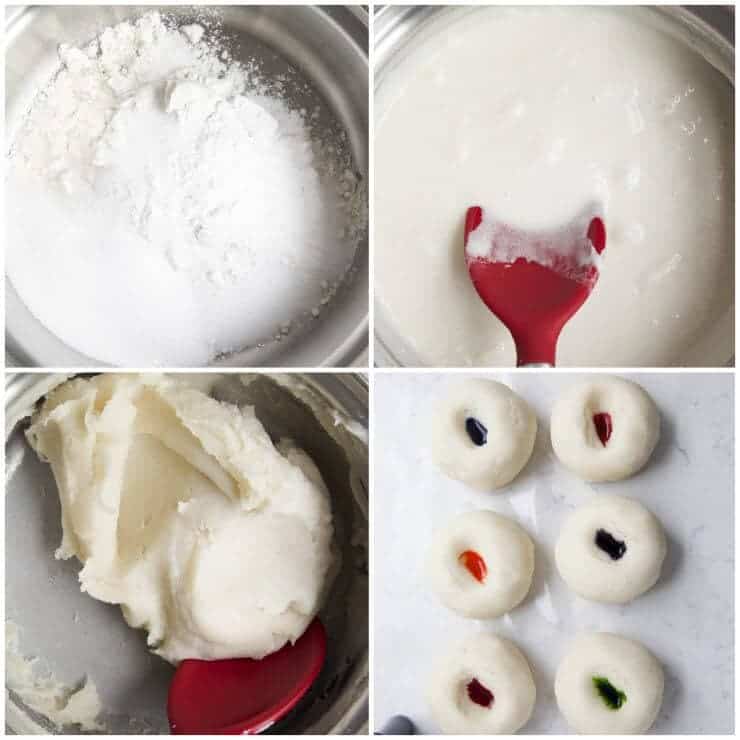
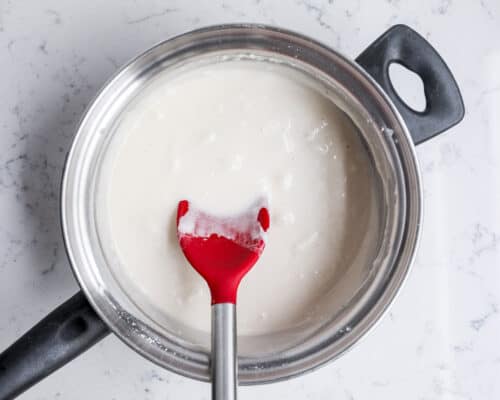
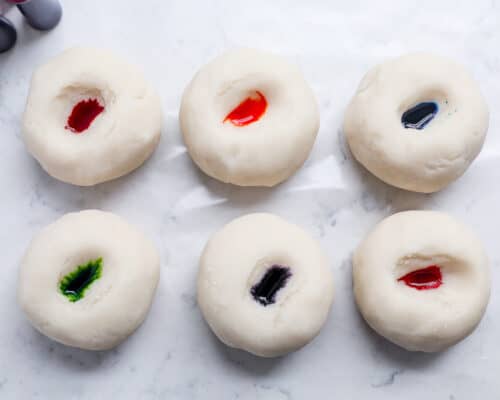
Stir together the flour, salt and cream of tartar in a large pot. Next add the water and oil. If you’re only making one color, add in the the color now as well. Cook over medium heat, stirring constantly. Continue stirring until the dough has thickened and begins to form into a ball. Remove from heat and then place inside a gallon sized bag or onto wax paper. Allow to cool slightly and then knead until smooth. If you’re adding colors after, divide the dough into balls (for how many colors you want) and then add the dough into the quart sized bags. Start with about 5 drops of color (my favorite brands are listed above) and add more to brighten it. Knead the dough, while inside the bag so it doesn’t stain your hands. Once it’s all mixed together you’re ready to PLAY.
Store the play dough inside the bags once done to keep soft. Keeps for up to 3 months.
Once the dough is finished, I like to put each dough ball into it’s own quart sized zip top bag. Then I let my kids squish the colors together. It gives the kids something to do, makes it so your hands aren’t stained and then gives the dough a home after. We use the same bag to store the dough when the kids are done playing with it. If you only plan on making ONE color, just add the food coloring into the pan when you add the water (makes it easier to mix it in). My kids can never decide on just one color, so we usually need to divide it out.
Need more kid friendly activities? Make homemade slime, fluffy slime or this recipe for butter slime, too!
HUNGRY FOR MORE? Subscribe to my newsletter and follow on Facebook, Pinterest and Instagram for all the newest recipes!
How to Make Homemade Playdough
Video
Equipment
- Spoon for stirring
- Gallon size bag or wax paper for cooling
Ingredients
- 2 cups all-purpose flour
- ¾ cup salt
- 4 teaspoons cream of tartar
- 2 cups lukewarm water
- 2 Tablespoons vegetable oil (coconut oil works too)
Optional: food coloring (I use Wilton for brighter colors)
Instructions
- Stir together the flour, salt and cream of tartar in a large pot. Next add the water and oil. If you’re only making one color, stir in the the color now.

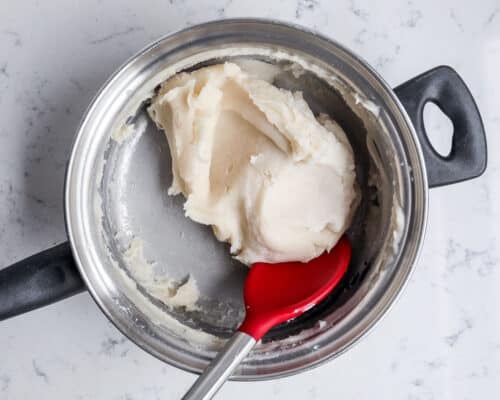
- Cook over medium-heat, stirring constantly. Continue stirring until the dough has thickened and begins to form into a ball. Remove from heat and then place inside a bowl. Allow to cool slightly and then knead until smooth.
- If you’re adding multiple colors, divide the dough into balls (for how many colors you want) and then add the dough into seperate quart sized bags. Start with about 5 drops of color and add more to brighten it. Knead the dough, while inside the bag so it doesn’t stain your hands.
- Once it’s all mixed together, you’re ready to PLAY. Store the play dough inside the bags to keep soft. If stored properly it will keep soft for up to 3 months.
Notes
Did you make this recipe? Don’t forget to give it a star rating below!
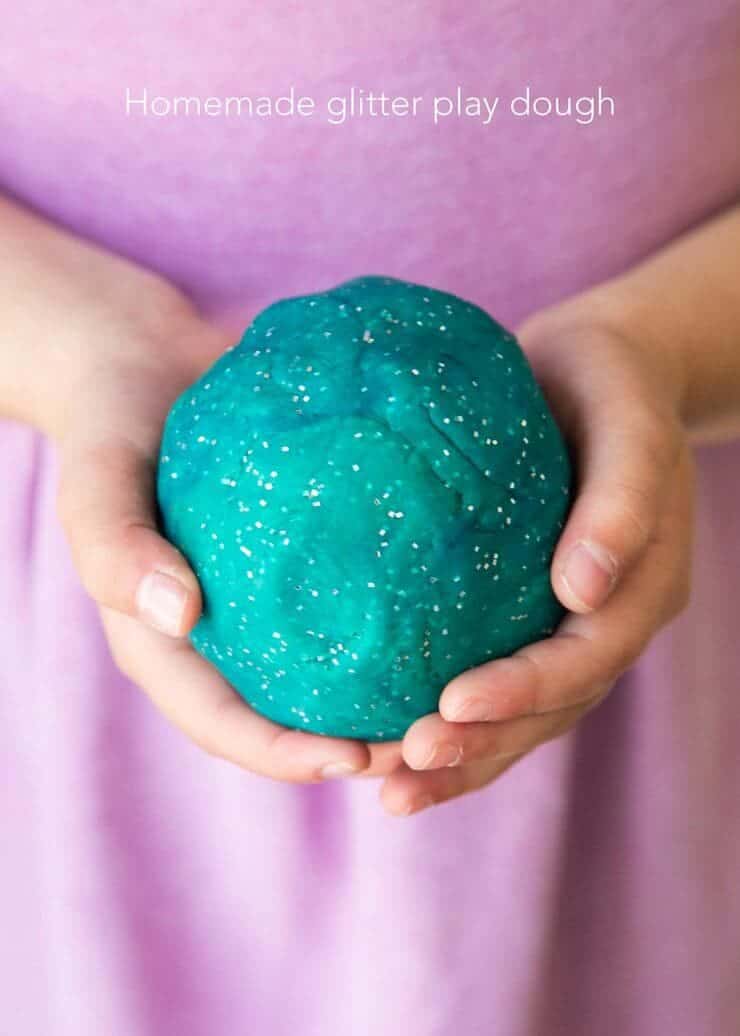
Another fun addition to the play dough is to add glitter. We added about 1/4 cup to the bag and kneaded it in with blue and yellow.
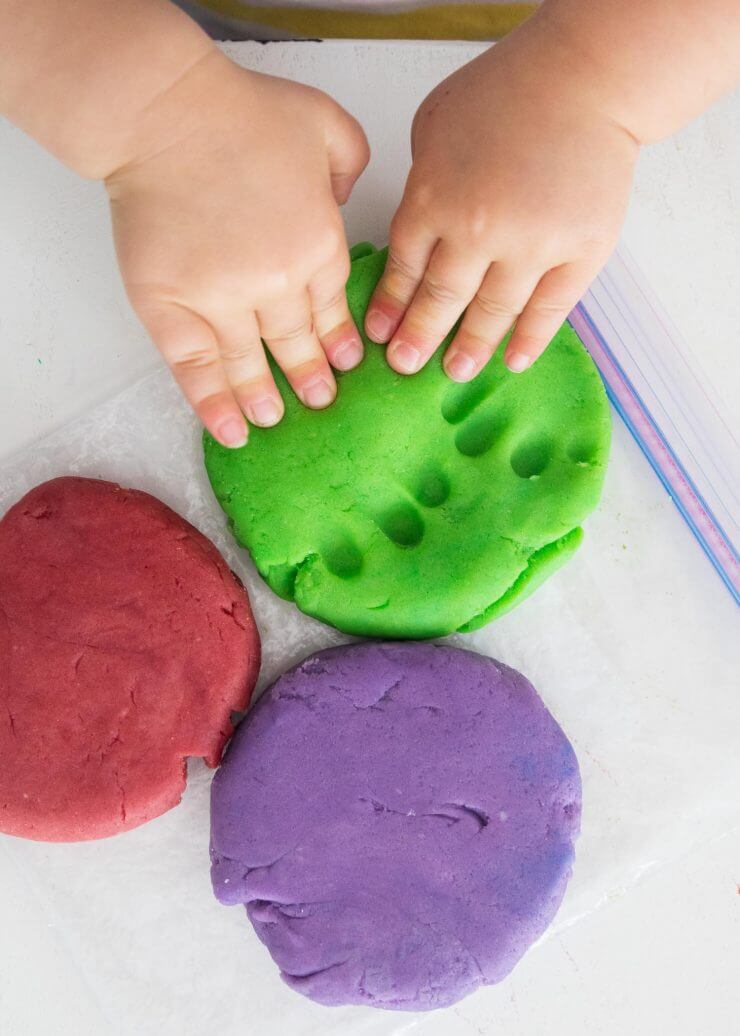
My almost 2 year old loves squishing the dough. I love watching those chubby little fingers go to work.
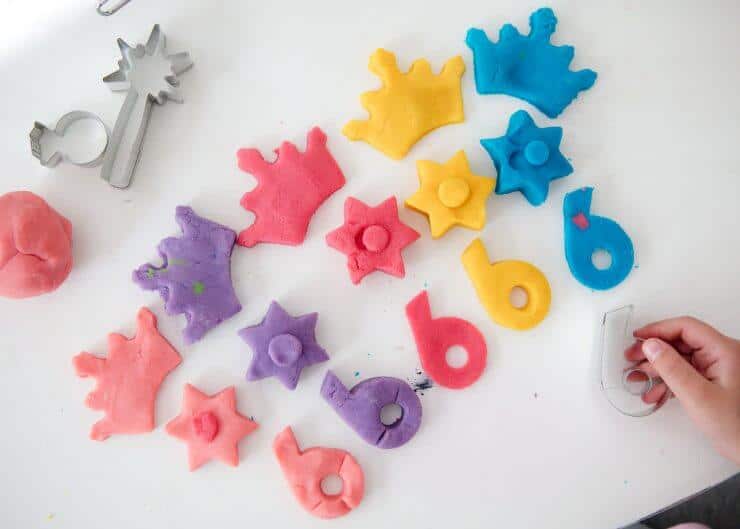
My 6 year old daughter loves pulling out the cookie cutters and making all kinds of designs! She is quite the girly girl. ;)
Make a batch for your kids once school is out for a summer to remember!
Categorized as: DIY

Jamielyn Nye is the founder and recipe creator at I Heart Naptime. She is the author of the I Heart Naptime Cookbook and shares easy family-friendly recipes and desserts for every occasion.

Thanks for the recipe. I had two 2 year-olds running around playing at the time and I needed to get it done before my 6 year old got home. So between lunch and naptime I made the playdough.
I use warm water to mix up the dough then I microwaved it twice mixing each time. I also used package of kool-aid for color and to make the dough scented. I mix it until the color form and the texture became smooth and silky.
This was the best dough I ever made. It make you want sit there and play with It, it naptime.
I’m so glad this playdough turned out so well for you! Thanks for your comment Connie! :)
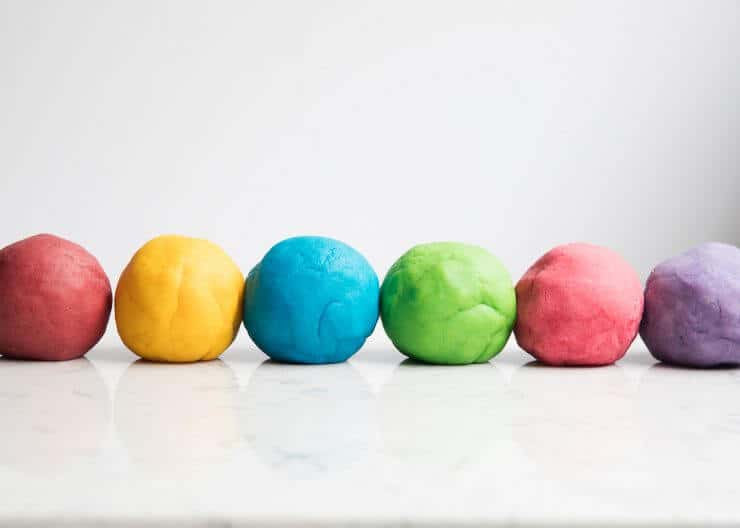
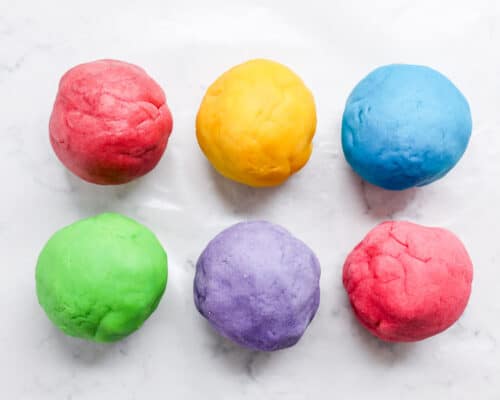
I really wanted to attach a picture of my batch but I will have to just comment to say that, yes, this play doh is just like fresh play-doh brand playdough or better! I made a half batch, split it into 6 clumps, colored them each the color of the rainbow, and then split each color in half so each of my kids got a little more than a handful of red, orange, yellow, blue, green and purple. I’m so thrilled with this. I hope it lasts well! Prior to this I used the no cook recipes and this blew that right out of the water!!
I’m so glad this turned out well for you! :)
So I made another half batch today (the one I made last time is still great texture, just the kids mixed up the colors and wanted new colors) and used the baby oil that another commenter had suggested. It’s not as good, even after I added a little Kore coconut oil after removing it from the heat. The baby oil makes it not as soft and fluffy feeling, more dried out if I had to use a descriptive word. I wanted to comment so other mom’s who look at the comments might know, the coconut oil worked SO good, the baby oil I’d only use if you didn’t have a better thicker cooking oil in stock.
Made this several times now…it works great…it’s soft and it does not dry out quickly…which is an added bonus! I make it often because my kids play with it…alot! Thank u so much!! I will never buy playdough again!
I’m so glad you love this play dough! Thanks for your comment Char! :)
I needed a faux “bread dough” for a lesson at this year’s VBS, and this recipe was just the thing! Came together so easily, thank you!
I’m making small clay flowers for my daughters wedding. She bought some silicone clay for me, but I’m finding it hard to work with. I’d like to try this to see if it works better. But can it be baked to harden it after a he flyers are made?
Hi Gail! I have not tried baking this dough before so I’m not sure. If you give it a try, definitely come back and let us know how it turns out! :)
I use an uncooked recipe that has the same ingredients (except that each is double your recipe). The recipe I use has boiling water instead of lukewarm water …. I have made double batches of this recipe so that 4 different groups in the school have their own fresh play dough every week. This past winter I saw a post about using baby oil instead of cooking oil — smells good and is quite silky to the touch. I like the idea of using cornstarch instead of cream of tartar, c of t is quite expensive ! I don’t know (chemically) what the c of t does in the playdough but the week I didn’t have any, the playdough was very sticky. I added almost 1 more cup of flour before it lost its stickiness! I have only made pastel shades as the teacher said that adding enough food colour to make vibrant colours stained the children’s hands. Has that been your experience? I am going To experiment with some of your ideas this summer so I can have it perfected in the fall ?
I’ve heard good things about using baby oil in play dough, but I’ve never tried it! The food coloring usually doesn’t turn my kids hands colors if the play dough has cooled. You could also try gel food coloring! :)
I used this recipe years ago, and then lost it. I’m so glad I found it on your blog via Google! I make each batch one color, and I use a small packet of kool aid for the coloring and it smells good too. :)
And I happen to have a bunch of food coloring that I was just thinking about throwing out! So, making this looks super fun. We are constantly throwing out play dough because it is dry and hard or because our little one loves to play with it on the dog! Haha.
Hope you have fun making play dough! :)
This was super fun, easy, and QUICK! Even with four little “helpers”!
So glad you had fun with this! :)
Just made this. Why do you think mine came out clumpy?
Hi Jennifer! I’m sorry yours turned out clumpy. I make sure to stir constantly and then knead the playdough until smooth.
I made your recipe and I added fresh herbs to give it a natural scent without colour. It turned out awesome!!
Sounds awesome! Thanks for sharing! :)
Hi! How many drops and which colors did it take to make that pretty color of purple?
Great recipe, easy and fun to make with the kids.
Hi Sandra! I’m not sure. I mixed blue and red until it looked right! :)
I have a two year old who absolutely loved this play dough. but is it bad if your child accidentally puts it in their mouths but don’t swallow any of it? This is my first child so just curious.
Hi Emmie! Everything in this play dough is edible, so it is totally fine. It wouldn’t taste very good but it shouldn’t be harmful :)
Looks interesting… I will try this with my grandkids!
I have made numerous batches of playdoh over the years (I’m a preschool teacher and have 3 little ones), and this was by far the best recipe…..it was so fast! I love how pliable it is for the kids, but not sticky. They’re thrilled!
I’m so glad you loved it! Thank you for your comment and review Kate. :)
I wonder if this can be made brown or tan somehow? I am thinking of making 6 different shades of skin playdough for my daughter to bring to school and share with her class so they can make little people! Maybe cocoa powder mixed in with the flour? I may need to experiment.
Hi Delina! If you mix red, yellow, and blue play dough it will make brown! :)
Hello Jamielyn, I want to make this for my 3 1/2 year old Grandson. Just wanted to know if high altitude would effect this recipe in any way. Thank you.
Hi Debbie! I’m not too familiar with baking in high altitudes so I’m not sure. I have heard in baking recipes at 3,500 feet to add 1 more tablespoon per recipe. For each additional 1,500 feet, add one more tablespoon. I’m not sure if it works the same in play dough, but it’s worth a shot. :)
I added the salt to the water separate and added at the end to break down the salt. It worked out great.