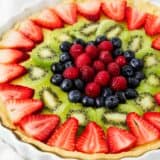
Each bite of this fresh fruit tart is a mix of crumbly sweet crust, smooth and decadent custard and juicy fresh berries! This is the perfect refreshing treat for warmer weather!
If you love this French dessert with fruit, you will also love these mini fruit tarts, fruit pizza and beignets.
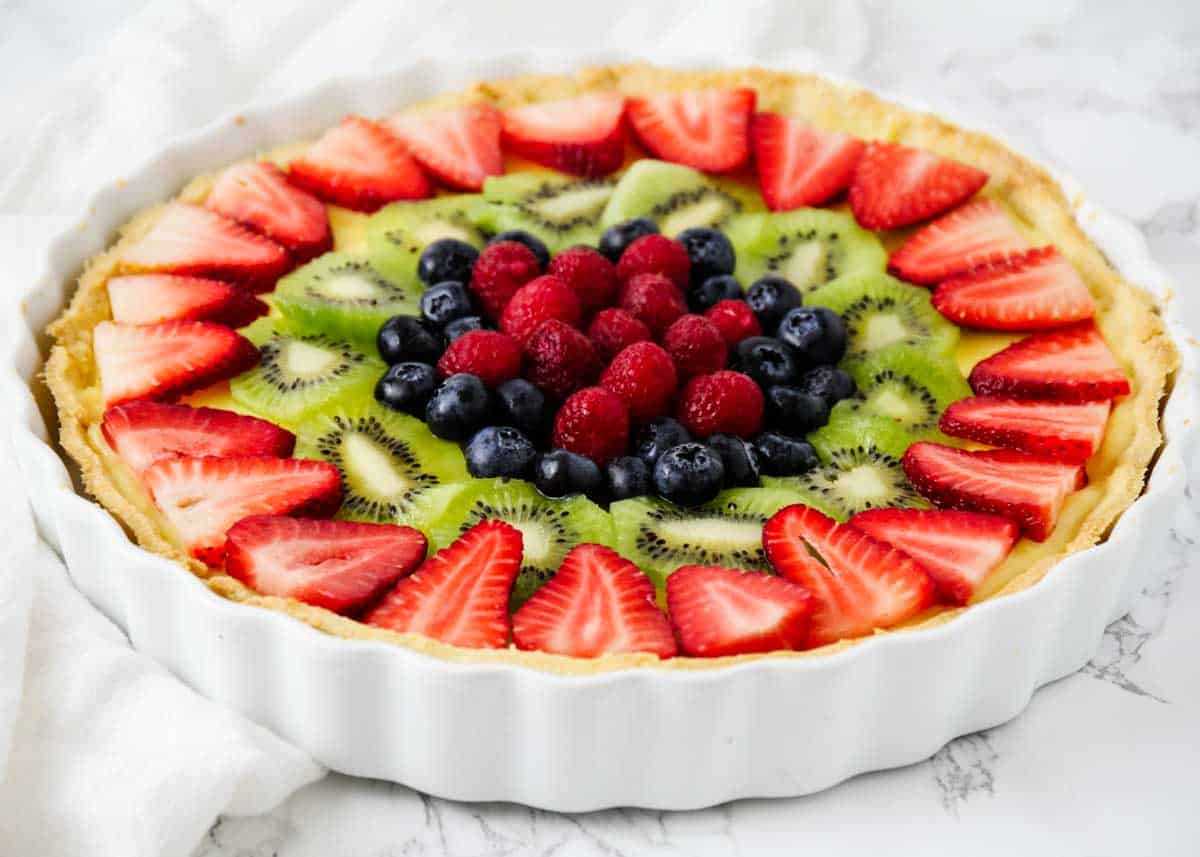
Table of Contents
Fruit Custard Tart
This fruit custard tart recipe is an elegant dessert to make for any event from a baby or bridal shower to graduation or for a 4th of July dessert. It always makes me feel like a French pastry chef and each bite is a mix of sweet pastry, decadent custard and juicy berries!
One of the things I love about spring and summer is the abundance of fresh, juicy produce that’s just waiting to be transformed into delightful treats. This fresh fruit tart is a great way to showcase the vibrant colors as well as my fruit platter recipe!
Ingredients
Scroll down for the full printable recipe.
- Flour: I use all purpose flour.
- Sugar: This is what makes the custard sweet.
- Salt: The little bit of salt brings all the flavors together.
- Butter: I’m using unsalted for this crust.
- Eggs: You’ll use the whole egg for the crust and just egg yolks for the custard.
- Milk: You’ll want to use whole milk here.
- Cornstarch: This acts as a thickening agent for the custard.
- Vanilla: I love to use pure vanilla extract for ultimate flavor.
- Fresh fruit: We love to top with fresh berries and kiwi, but you can top with whichever fruit is in season.
How to Make a Fruit Tart
It does take a little advance planning, since both the tart pastry and the pastry cream need time to chill in the refrigerator, but each step is pretty simple and straightforward. When it comes time to assemble the fruit tart, it’s really quick to put together but still looks very impressive.
Crust
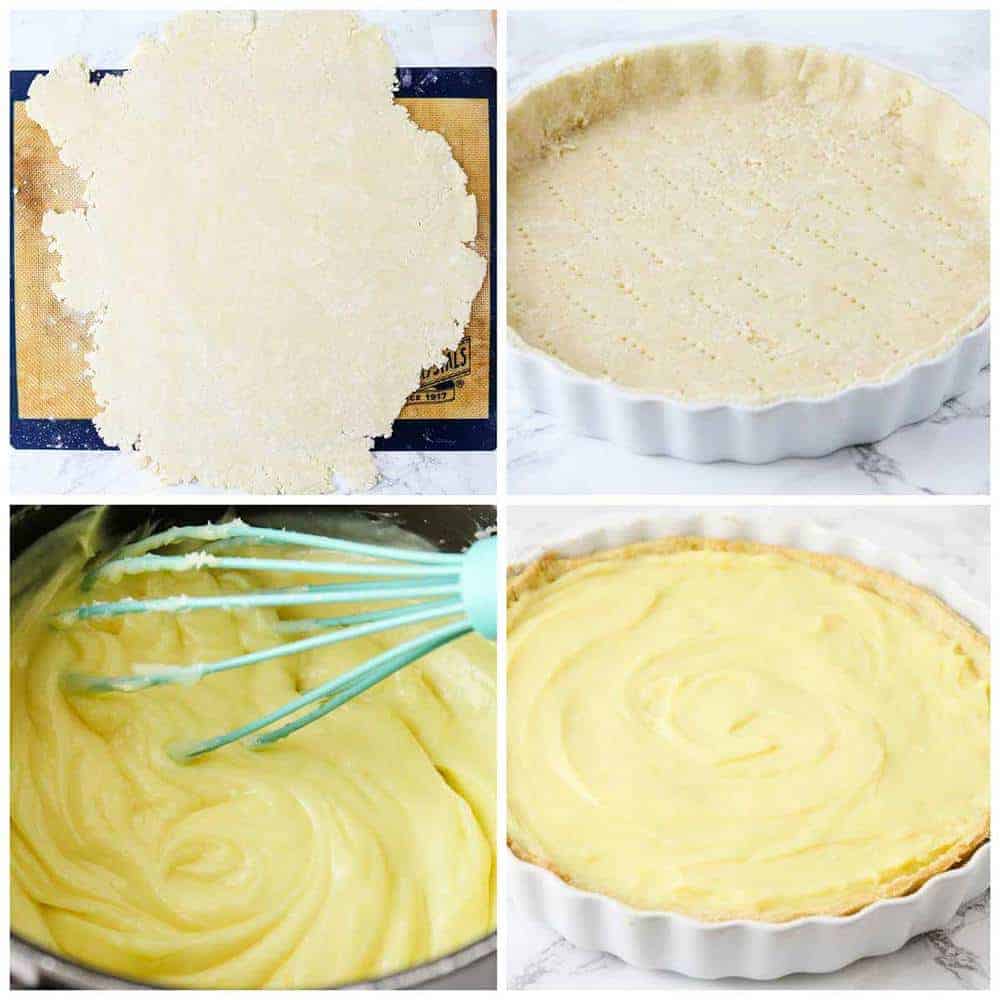
- Make dough. In a blender or food processor, pulse together the flour, sugar, salt and butter until butter pieces are no bigger than pea size. Add the egg and pulse until dough starts to clump together. Add milk as needed to help the dough come together. Shape into a disc and refrigerate for 30 minutes.
- Shape in pan. Preheat oven to 350°F and grease a 10 inch tart pan. Roll the dough out on a floured surface, so that it’s size it’s slightly bigger than the tart pan and is about 1/4 inch thick. Then press dough onto bottom of pan and form up the sides. Pierce the dough several times with a fork.
- Bake in oven. Bake crust for 18 to 22 minutes, or until lightly golden. Allow to cool completely.
Custard
- Mix and thicken. In a medium saucepan, whisk together the eggs, sugar, cornstarch and salt until well combined and no lumps remain. Then whisk in the milk until well combined. Heat the mixture over medium-high heat for 2 to 4 minutes, or until thickened. Remove from heat and whisk in the vanilla.
- Pour into crust. Next add in each piece of butter separately, whisking until completely melted before adding the next piece. Pour the hot mixture on top of your cooled tart crust and place a layer of plastic wrap directly on top. Refrigerate for two hours, or until custard is chilled through.
Assembling
- Add fruit on top. To assemble, simply top with fresh fruit like strawberries, kiwi, raspberries, blueberries or even a fresh peach pie filling. Refrigerate until ready to eat.
Decorations
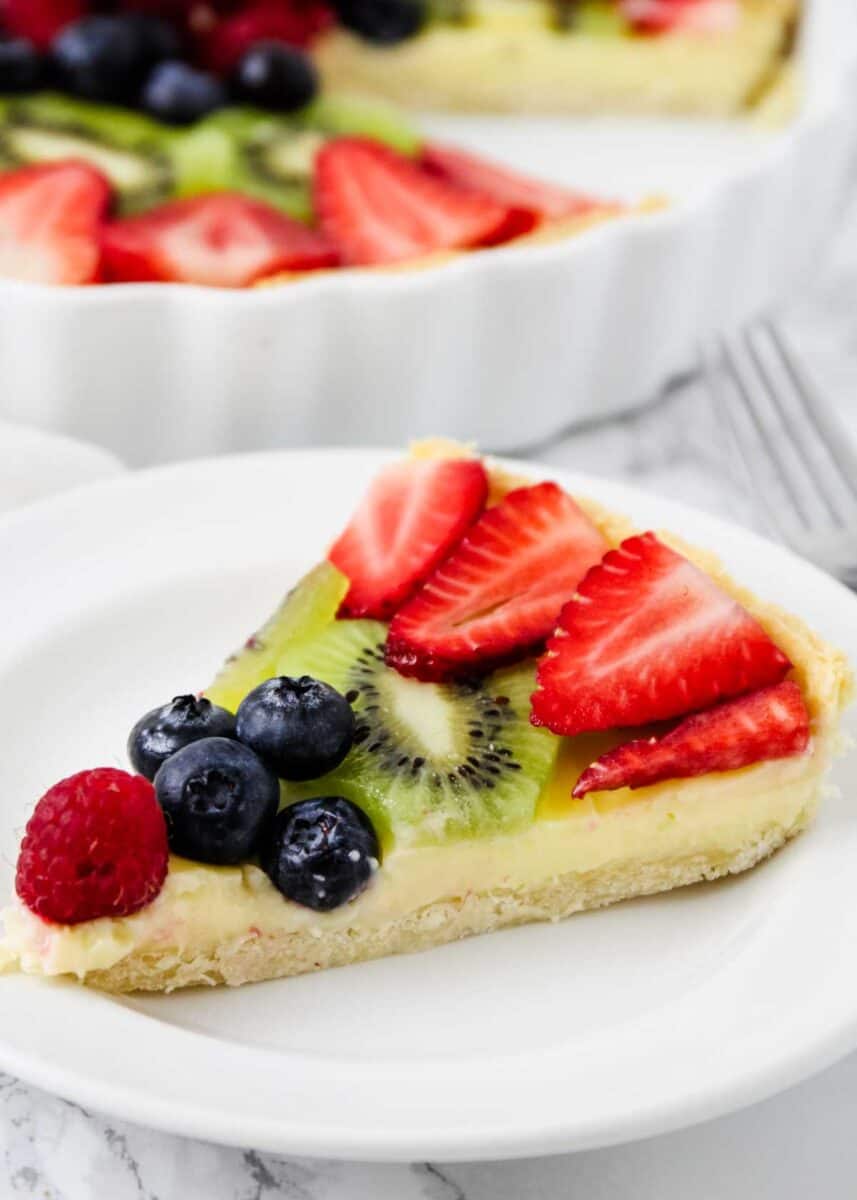
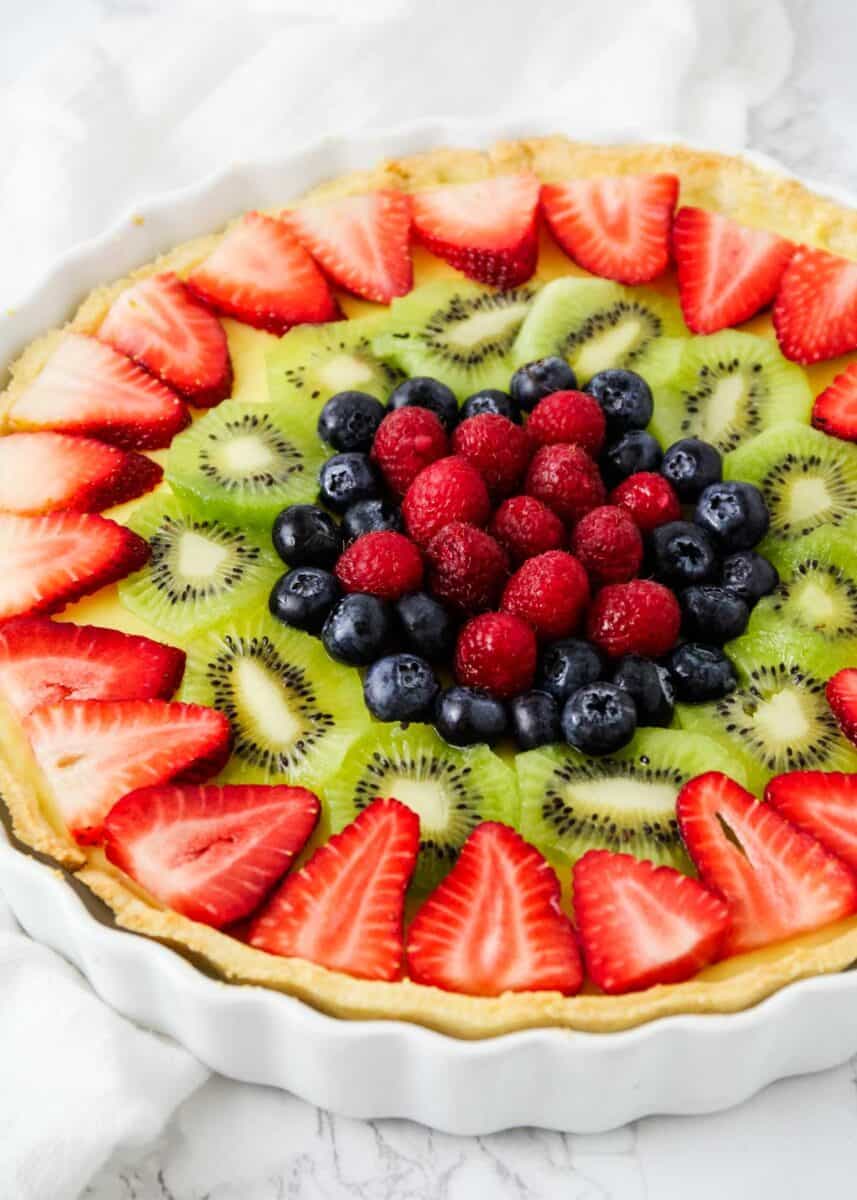
Fruit tarts are so fun and easy to decorate! You can make it as simple or intricate as you want. I love to add all my different types of fruit in a circular pattern starting around the edges. You could even sprinkle on some powdered sugar, shredded coconut or top with a fruit glaze.
I love to decorate with red and blueberries to celebrate 4th of July, similar to my flag fruit pizza. It’s so fun and festive!
Recipe FAQs
I find for the best taste use whatever is in season if possible as well as pick a variety to add both color and texture. You could stick to a theme with tropical fruits like mango, kiwi and starfruit or do citrus themed and have berries with mandarin oranges or clementines. I would not use bananas as they are prone to browning quickly. If you would like to use pears or apples, it’s best to follow this apple tart recipe instead.
Yes! To make the smaller version, you’ll prepare the dough and custard as instructed – however the assembly will be a bit different. Instead of using a big tart pan, you’ll use a greased muffin pan by rolling out dough to 1/4 inch thickness and then cutting into shapes that are slightly larger than the muffin well. Press dough into each muffin cavity and prick with a fork before baking about 18 minutes. Cool and then assemble with pastry cream and berries.
This recipe for mini fruit tarts makes enough for 12 smaller fruit tarts.
Yes, you can easily make this recipe ahead of time. I would just recommend waiting to assemble it until the day of serving. Simply bake your tart crust, then let cool and tightly cover with foil.
You can also make your custard ahead of time as well. Then cover tightly with plastic wrap and store in fridge until ready to use. When ready to assemble, simply pour custard in tart shell and decorate with fruit on top.
It will keep in the refrigerator for about 2 to 3 days. To store, simply cover with plastic wrap and place in fridge until ready to enjoy again.
More Delicious Fruit Desserts
HUNGRY FOR MORE? Subscribe to my newsletter and follow on Facebook, Pinterest and Instagram for all the newest recipes!
Fruit Tart Recipe
Video
Ingredients
For the Crust:
- 2 cups all-purpose flour
- 2 Tablespoons granulated sugar
- 1 teaspoon salt
- ½ cup butter , cut into 1 inch pieces
- 1 egg
- 1 Tablespoon milk , more as needed
For the Custard:
- 4 large egg yolks
- ½ cup granulated sugar
- ¼ cup cornstarch
- ¼ teaspoon salt
- 1 ½ cups whole milk , at room temp (do not substitute)
- 1 Tablespoon vanilla extract
- 4 Tablespoons butter , cut into tablespoon sized pieces
To Assemble:
- Fresh fruit of your choice
Instructions
For the Crust:
- In a blender or food processor, pulse together the flour, sugar, salt and butter until the butter pieces are no bigger than pea size. Add the egg and pulse until the dough starts to clump together. Add milk as needed to help the dough come together. Shape into a disc and refrigerate for 30 minutes.
- Preheat the oven to 350°F and grease a 10 inch tart pan. Allow the dough to sit for a few minutes to soften slightly and then roll the dough out on a floured surface. The size should be slightly bigger than the tart pan and is about 1/4 inch thick.
- Then press dough onto bottom of pan and form up the sides. Pierce the dough several times with a fork.
- Bake crust for 18 to 22 minutes, or until lightly golden. Allow to cool completely.
For the Custard:
- In a medium sauce pan, whisk together the eggs, sugar, corn starch and salt until well combined and no lumps remain. Then whisk in the milk until well combined. Heat the mixture over medium heat for 3 to 5 minutes, or until the custard has thickened. Make sure to keep stirring the entire time so it doesn't burn. Remove from heat and whisk in the vanilla.
- Next add in each piece of butter separately, whisking until completely melted before adding the next piece. Pour the hot mixture on top of your cooled tart crust and place a layer of plastic wrap directly on top. Refrigerate for two hours, or until custard is chilled through.
To Assemble:
- Top with fresh fruit like strawberries, kiwi, raspberries and blueberries. Refrigerate until ready to eat.
Notes
- Prepare the dough and custard as instructed – however use a greased muffin pan instead of a tart pan for the crust.
- Roll the dough out to about 1/4 inch thick, then use a cookie cutter to cut dough into scalloped circles that are slightly larger than the wells of your muffin pan.
- Press the circles into the bottom of the muffin cups and pierce several times with a fork. Bake for 15-18 minutes, or until lightly golden.
- Let cool completely, then add in custard and top with fruit. This recipe makes enough for 12 smaller tarts.
Nutrition
Nutrition provided is an estimate. It will vary based on specific ingredients used.
Did you make this recipe? Don’t forget to give it a star rating below!
Recipe contributed by Alicia from The Baker Upstairs for I Heart Naptime.



For making the custard in the sauce pan, is the heat supposed to be on during this process:
“In a medium sauce pan, whisk together the eggs, sugar, corn starch and salt until well combined and no lumps remain. Then whisk in the milk until well combined.”
Or do you heat up the mixture after it’s all been mixed together? Thank you!
I whisk the ingredients together first and then heat over medium for 2-4 minutes. :)
I followed this recipe to the letter and it turned out PERFECT – flaky crust and creamy custard. Thanks!
I’m so glad you enjoyed it! :)
Hi! I was just wondering if there would be any reason why my custard came out more like a liquid than thicker? Thanks!
Hi Kimberly! Oh no! Since I wasn’t there with you cooking it, it’s hard to say exactly… but my guess is the egg mixture wasn’t cooked long enough to thicken. The key is low and slow for a custard. If you didn’t use whole milk that would have been it as well. Hope that helps!
Thank you for such quick response and great tips! I’ll definitely try it again!
I am confused on how I’m supposed to whisk together the egg yolks flour and sugar when I tried the first time it was just a lumpy goooey mess its not enough liquid to whisk together so it remained clumpy when I added the milk
Hi Charlotte! I use a food processor or blender to do this. I don’t think a whisk would be strong enough unfortunately! There is a video that shows the process and what it should look like as you go. Hope that helps! :)
Used this recipe for the custard. Came out very good !
I’m so glad you enjoyed it!
Is the tart pan a mini or regular size using a 3 to 4 inch cookie cutter
Either will work but I’ve only tried the regular size!
When baking the tart shell should pie weights be used? I know with some tarts it’s needed to keep the tart from puffing up.
Hi Amber! You can use pie weights, but I just poke the dough with a fork to help with the puffing up. :)
This fruit tart was SO good !
This is a great summer dessert! It is fun to make and to eat and is always a hit!
Not yet … I saw you made the dough 2 different ways then you used the shape cutters….. which way should the dough be made? Either way?
Hi Emily! Yes, either way will work! :)
Hi can u use premade frozen tart shells for recipe and thaw before using then making homemade
Yes, of course! :)
The tart shells were great but my custard was just liquid wondering what I did wrong!
It definitely shouldn’t be liquidy, but it sets more in the fridge. I’m not sure what went wrong! I’m sorry it didn’t work out for you!
Loved this recipe! I did a major tweak, though, and subbed the milk for plain yogurt! The consistency turned out great and it had a bit of tartness that I like!
I’m so glad you enjoyed it! :)
This was such a fun recipe to make, and I felt like a pro after arranging all the fruit, so wonderful!
I’m so glad you enjoyed them! :)
This delicious tart never fails to impress!
Do you have to use the food processor to make the dough? I don’t have a food processor or blender. Would a stand mixer still do okay for this recipe?
I would probably use a pastry cutter or forks at first and then my hands to knead the dough. :)
Hello—What is the diameter measurement of the white biscuit cutter?
Thanks, Irena
This was a guest post so I’m not sure, but I would guess 3 or 4 inches in diameter.
Your video makes it look like you don’t cook the pastry cream.
Hi Adriane. The pastry cream is cooked on the stove according to directions. The video is just cut to make the video shorter.
Can I not use vanilla extract?
You don’t have to use the vanilla, but would definitely lose some of the flavor.
Hi. These look really good. I would like to make tarts for a wedding but the reception is outdoors. Will these be good for that type of environment or do they need to be in an air conditioned environment?
Hi Tonya! I wouldn’t recommend these fruit tarts for an outside reception if they will be out for more than an hour. They are served best right from the refrigerator!
1T seems like a lot of vanilla. Was it supposed to read 1t?
Yes, it’s 1 Tablespoon! :)