This easy homemade cake pop recipe is covered in a sweet chocolate coating with a delicious crumb. The perfect bite-sized party treat or favor for any occasion!

Table of Contents
Homemade Cake Pops
This cake pop recipe is very similar to my cake balls. Not only do these cake pops taste incredible, but they look amazing too! Moist and crumbly cake is mixed with rich buttercream frosting, then dipped in a sweet chocolate coating.
These homemade cake pops are the perfect treat for birthdays, baby showers, wedding showers, holidays or when hosting a dinner party. You can even wrap them up individually and give them to guests as party favors!
This recipe looks intimidating but is perfect for beginners, with an easy step by step tutorial included. It’s a great way to use up any leftover cake and frosting.
Recipe Ingredients
Find the full printable recipe with specific measurements below.
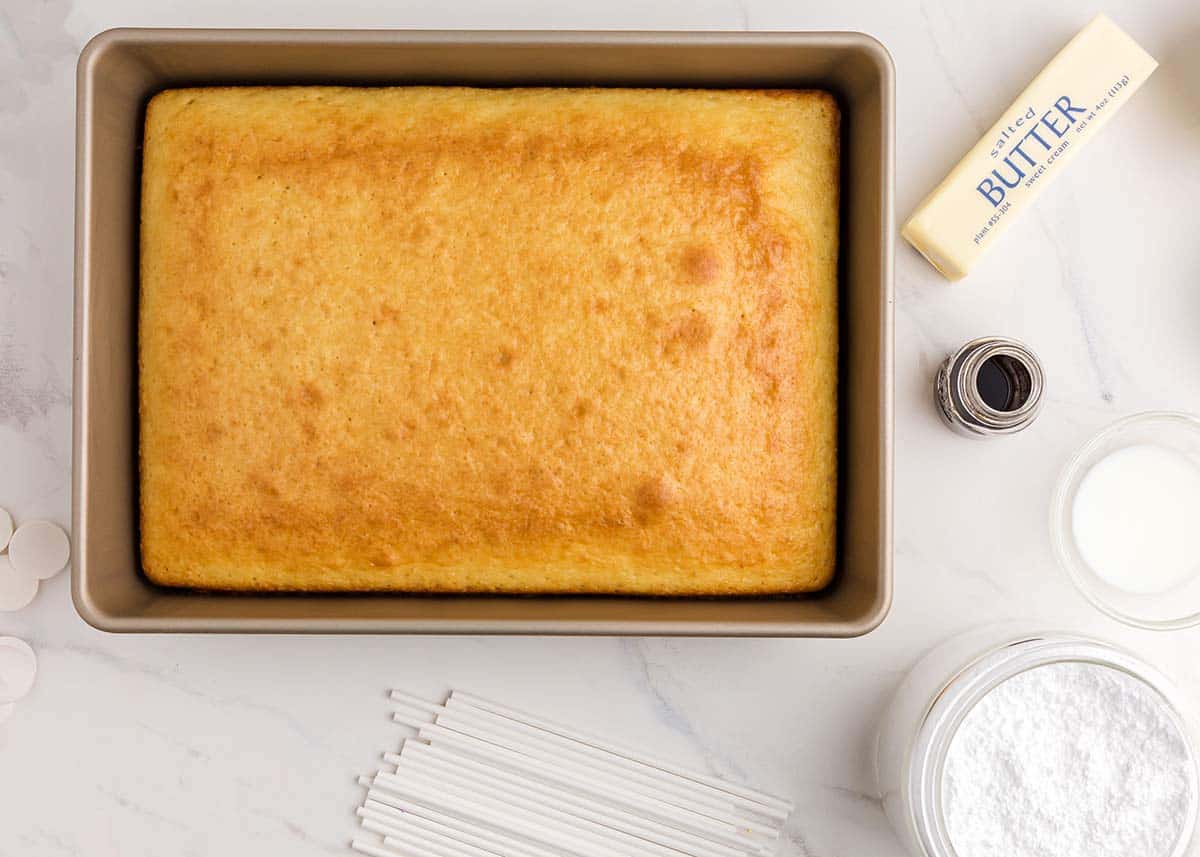
- Cake mix – Use your preferred flavor of cake mix here. Alternatively, you can bake your favorite from-scratch recipe. Bake according to the instructions.
- Melting wafers – I prefer the Ghiradelli melting wafer in vanilla or chocolate.
- Salted butter – If you only have unsalted butter, just add in a pinch of salt to the frosting.
- Powdered sugar – This will help bring the sweetness and stability to the frosting.
- Heavy cream or milk – This helps makes the frosting creamy.
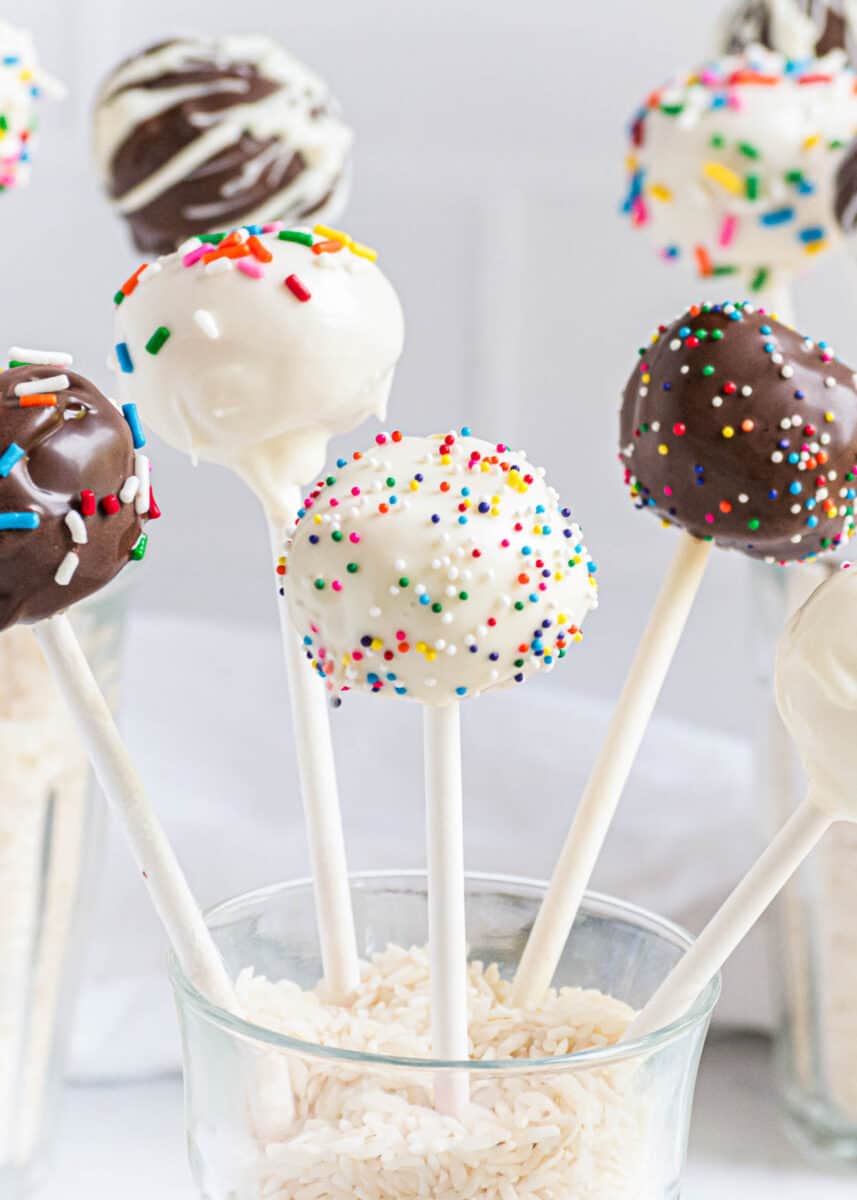
- Sprinkles – Use your favorite sprinkles, jimmies, or other desired decorations.
- Cake pop sticks -Don’t forget the cake pop sticks. Although you could make cake balls instead if preferred.
Frosting for Cake Pops
A classic buttercream is also my favorite type of frosting for cake pops, but feel free to use others like chocolate buttercream or strawberry buttercream.
Below are a few different flavor combinations that would taste delicious:
- Vanilla cake + classic buttercream
- Chocolate cake + classic buttercream
- Red velvet cake + cream cheese frosting
- Birthday cake (funfetti) + classic buttercream
- Lemon cake + lemon frosting
- Carrot cake + cream cheese frosting
- Strawberry cake + strawberry frosting
How To Make Cake Pops
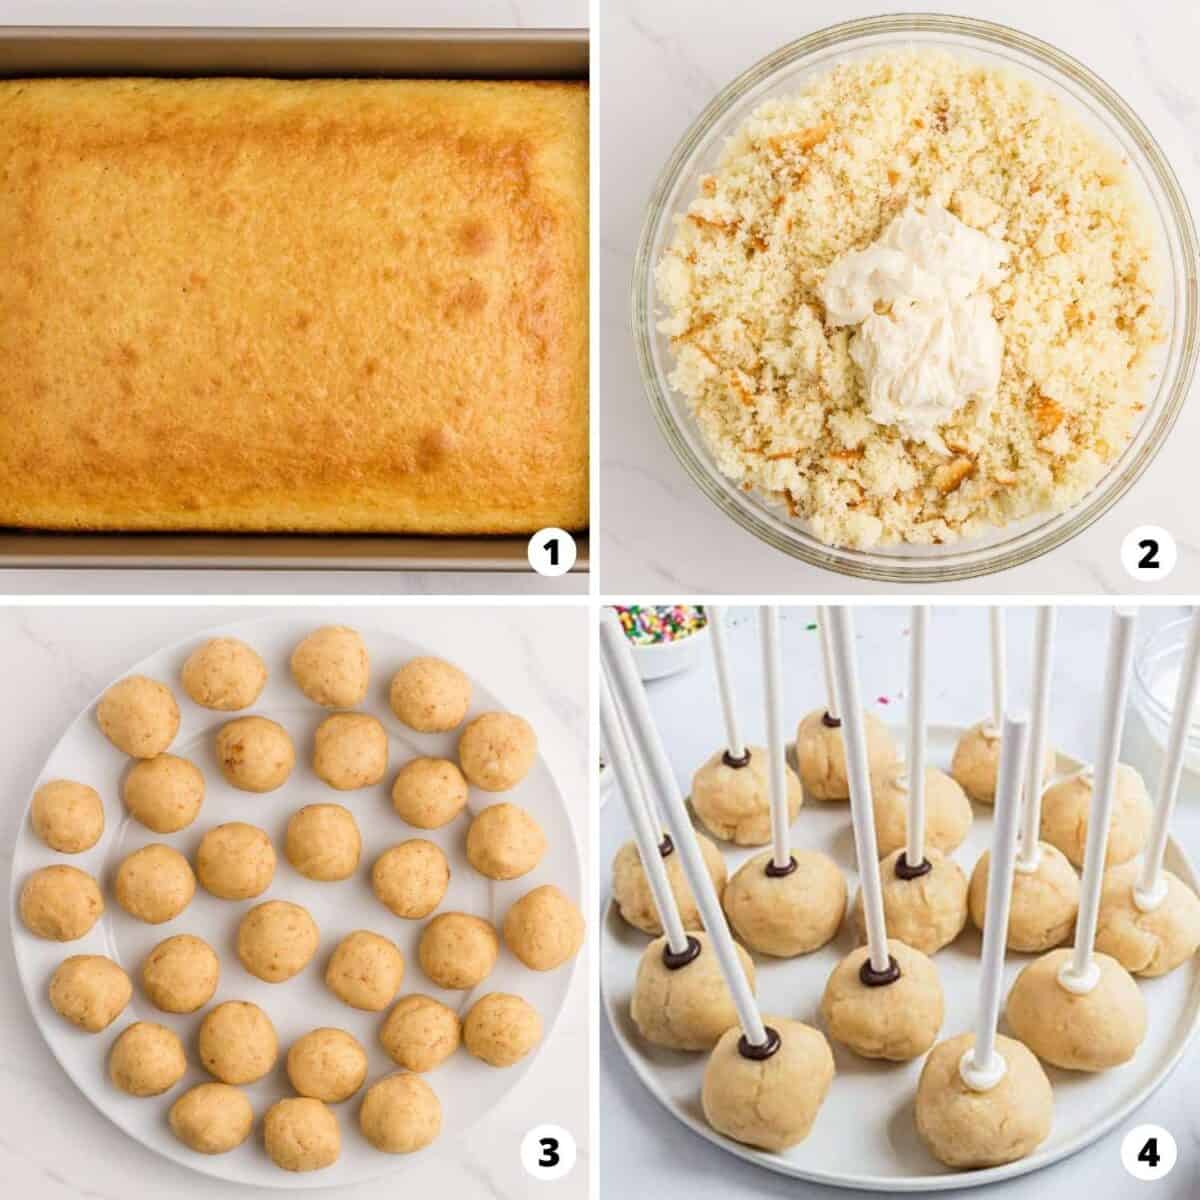
- Crumble. Allow the cake to cool slightly and then crumble in a large bowl.
- Mix. Add a few spoonful’s of frosting and use your hands to combine. The dough should hold together if squeezed. If it’s still crumbly, stir in a little more frosting.
- Scoop. Then scoop out the mixture with a medium cookie scoop (about 1 1/2 Tablespoons) and roll into a ball. Repeat until you’ve used all of the mixture.
- Add cake pop stick. Melt a few of the dark and white chocolate wafers in two separate bowls. Then dip the end of the cake pop stick into the melted chocolate and push that same end into the cake ball. The melted chocolate helps “glue” the stick to the cake ball. Once each ball has a stick, place them in the freezer to harden for about 20 minutes.
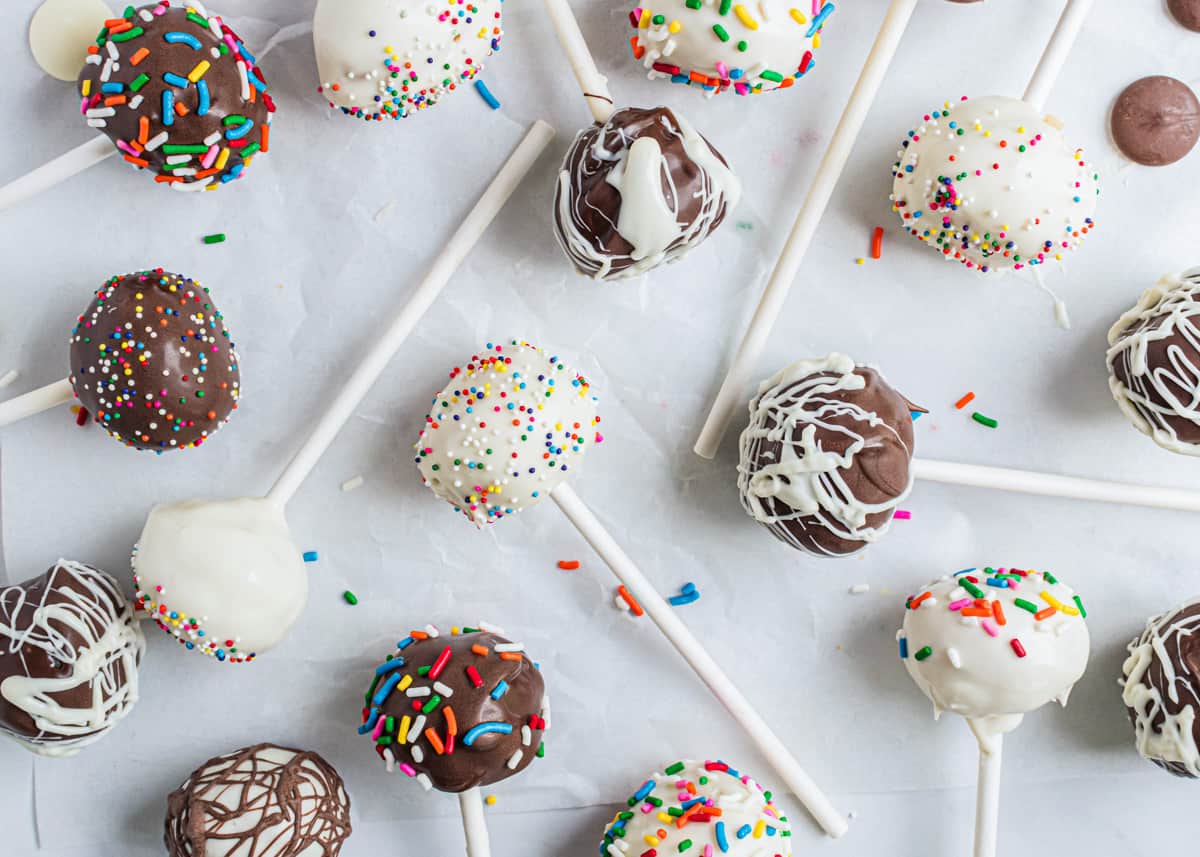
- Coat in chocolate. Melt the remaining dark and white chocolate in separate bowls. Use a taller glass or jar for easy dipping. Dip the cake balls into the melted chocolate, making sure it’s fully coated. Gently tap the stick on the side of the dish to remove any excess chocolate.

Decorations
There are so many ways to decorate cake pops!
- Add sprinkles or jimmies
- Drizzle with more melted chocolate
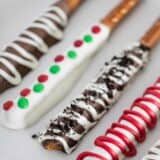
- Sprinkle crushed oreos like I did in these oreo cake pops
- Make them for a holiday (Valentine cake pops, easy Halloween cake pops or Easter cake pops are fun)
- Dye the cake batter with food coloring for a fun surprise when biting into them
- Make them into a cake pop bouquet for a fun gift or centerpiece

Expert Tips
- Half batch of frosting – I made a half batch of my buttercream frosting and used only half of that amount. How much frosting you need will depend largely on how moist the cake is. Mine was VERY moist, so I only used half.
- Add enough frosting – Make sure to add enough frosting or else they will crack and fall apart after freezing. Add the frosting in gradually though, because including too much could cause them to be soggy.
- Chill in freezer – It is very important that they are cold. They will not hold form or hang onto the stick if they aren’t cold enough, especially when you start dipping and covering with the melted chocolate. I also take half of the batch out at a time, so the other half doesn’t soften up while I’m coating in chocolate.
- Melting the chocolate – If the chocolate hardens up while in the bowls, you may need to reheat and melt again. Make sure to only heat the chocolate for 30 second increments. Any longer can burn the chocolate.
- Dipping method – You can either dip the cake ball into a deep, 2 cup measuring cup filled with melted chocolate or tall glass. Tap on the edge to remove excess chocolate.
- Holding upright – Use a glass filled with rice or sprinkles (like below), or a styrofoam block to hold the cake pop upright.
FAQs
It’s all about the frosting! When you mix the frosting in with the cake, the mixture should hold together when squeezed. If the mixture is crumbly, that means it needs more frosting. Make sure to only add in a little at a time so that the cake doesn’t get too soggy. If you have a very moist cake, you may not need much frosting at all.
If the chocolate coating has cracked, it’s likely due to the difference in temperature between the cake balls and the melted coating chocolate. Don’t freeze the balls for longer than instructed, or else the super cold cake combined with the warm melted chocolate could cause cracking.
The type of chocolate you use can also contribute to whether or not the cake pops crack. Using melted chocolate chips may cause cracking, so I’d suggest using chocolate melting wafers instead. They have a thicker texture once hardened and a smooth finish, which result in a more sturdy exterior.
Sure! While I prefer homemade frosting over canned, I’ve never been one to shy away from an easier shortcut! Store-bought frosting usually comes in a 16 ounce can, so you’ll only need half (8 ounces) to make this recipe.
I’ve had the most success using chocolate melting wafers because of their super smooth finish (Ghirardelli melting wafers are my favorite). A high quality chocolate bar (such as Ghirardelli or Bakers) would be the next best option.
They can be! Use your favorite gluten-free cake mix or pick up a premade gluten-free cake from your local grocery or bakery. All other ingredients needed to make this recipe are free from gluten!
They will stay fresh for 3 to 4 days if stored in an airtight container in a cool place.
Yes you can freeze them, just make sure they’ve dried completely before freezing. They will stay fresh in the freezer for up to 6 weeks. Let thaw at room temperature when ready to serve.
More Bite-Sized Party Treats


HUNGRY FOR MORE? Subscribe to my newsletter and follow on Facebook, Pinterest and Instagram for all the newest recipes!

Cake Pop Recipe
Video
Equipment
- 24 cake pop sticks
Ingredients
- 15 ounce box white cake mix , cook according to package directions in a 9×13" pan
- 10 ounce package dark chocolate melting wafers
- 10 ounce package white chocolate melting wafers ,I prefer Ghiradelli
Buttercream Frosting
- 1 stick salted butter , softened
- 2-2 ½ cups powdered sugar
- 1 teaspoon vanilla extract
- 1 Tablespoon heavy cream or milk
Optional: Sprinkles, jimmies or other desired decorations
Instructions
Make Buttercream Frosting
- In a medium bowl, whip the butter. Add in 1 cup of powdered sugar. Mix until combined. Add the vanilla and additional powdered sugar, a little at a time. Add 1 Tablespoon of heavy cream or milk to make the frosting thick and creamy. It should hold a point.
Make Cake Pops
- In a large bowl, crumble the prepared cake into fine crumbs (make sure it has cooled slightly before crumbling). Add 2 spoonfuls of buttercream frosting to the cake. Combine with your hands or a spoon. Gradually add more frosting until the cake holds together if squeezed. You don't want it too crumbly or it won't hold together.
- Using a cake pop press or medium cookie scoop and scoop cake mixture. Roll into a ball and place onto a plate. Repeat until all the cake mixture has been formed into balls. Freeze balls for about 10 minutes.
Dip in chocolate
- Right before they are ready to be taken out of the freezer, melt the dark chocolate and the white chocolate in two separate microwave safe bowls. Begin by heating for 30 seconds and then stirring.
- Dip each lollipop stick into the chocolate and then into the center of the cake pop. Return to the fridge or freezer until chocolate is set. Pour chocolate into a glass cup or skinny jar and then dip cake pops, one by one. Gently tap the stick on the side of the melting dish to let the excess drip off. You can also spin or twirl the cake pop to remove the excess.
- Before the chocolate starts to harden, add sprinkles, jimmies or other decorations. If decorating with more chocolate, let the chocolate covering harden on the cake pop.
- Push the cake pop stick into a styrofoam block or use a glass filled with rice to hold them upright. The chocolate will be set in about an hour. Store for 3-4 days in an airtight container in a cool place.
Notes
- Make sure that you’re only working with about five cake pops at a time. Leave the rest in the freezer so that they don’t soften too much while you work on the others.
- After dipping the stick in melted chocolate, let it dry first before sticking into the cake ball. It’s easier to work with this way and is less likely to fall off when dipping the whole cake pop into melted chocolate.
- Discard any brown edges of the cake before crumbling.
Nutrition
Nutrition provided is an estimate. It will vary based on specific ingredients used.
Did you make this recipe? Don’t forget to give it a star rating below!
Categorized as: American, Birthdays, Cake + Cupcakes, Chocolate, Desserts, Mini, Reader Favorites

Jamielyn Nye is the founder and recipe creator at I Heart Naptime. She is the author of the I Heart Naptime Cookbook and shares easy family-friendly recipes and desserts for every occasion.


It was amazing and so good! Can’t wait to make it again.
Yay! I’m so happy to hear that you loved it, Laine :)
Hi Ashley, You will be using 2 – 2 1/2 cups of powdered sugar. We recommend starting with 2 cups and add more as needed for desired texture and flavor :)
can i make them without the stick? like cake balls?
Definitely! :)
Hi can I pop them in the fridge because my freezer isn’t big enough to hold a baking tray full of cake pops?
That should be fine, you’ll just most likely need to chill them in the fridge for a longer period of time so that they harden.
I just looked at the recipe and and it looked awesome cuz we just did another recipe so do not do cake mix and plane jelatin it was vary jello mix and it was descusting
this recipe is great i did it and it works great they turned out yummy!!!
Awesome! So glad you loved them :)
Very simple and delicious! My daughter loved it.
Great! So glad they were a hit with your daughter :)
This worked very well! lovely recipe! yummy too !!🤤🤤
super delicious! i made these with my mom and they are perfect :D
Can I use marshmallow frosting to mix the cake with?
I haven’t tried it before but I think that should be fine! :)
Hello, I am pretty young and I find these so much fun and so easy to make. These are teen approved lol. Thank you for the amazing recipe.
I’m so glad you enjoyed them!
I tried dipping in chocolate and the cake fell off the stick, is my chocolate not ready to dip yet?
Hi Maggie! Your chocolate may have been too thick. You can thin it down with some vegetable oil!
Hi, I was wondering about how many cake pops does one cake mix box make?
Hi Katrina! It depends how large or small your cake pops are. I would say between 30-35.
This recipe is delicious!!!!😋😀
What is the shelve life for cake pops
They should last up to a week in the fridge.
So I want to make festive cakepops and overall this looks great
I think I may have added the frosting when it was still a little warm (too early) , does that affect it ?
It might melt a little, but I think it should set up fine.
Soooooooooo yeah it might melt off depending on how warm it is so try to avoid that next time.
I can’t resist a bite-sized dessert! Thanks for the delicious and adorable idea!
Love cake pops! These are super easy to make too. :)