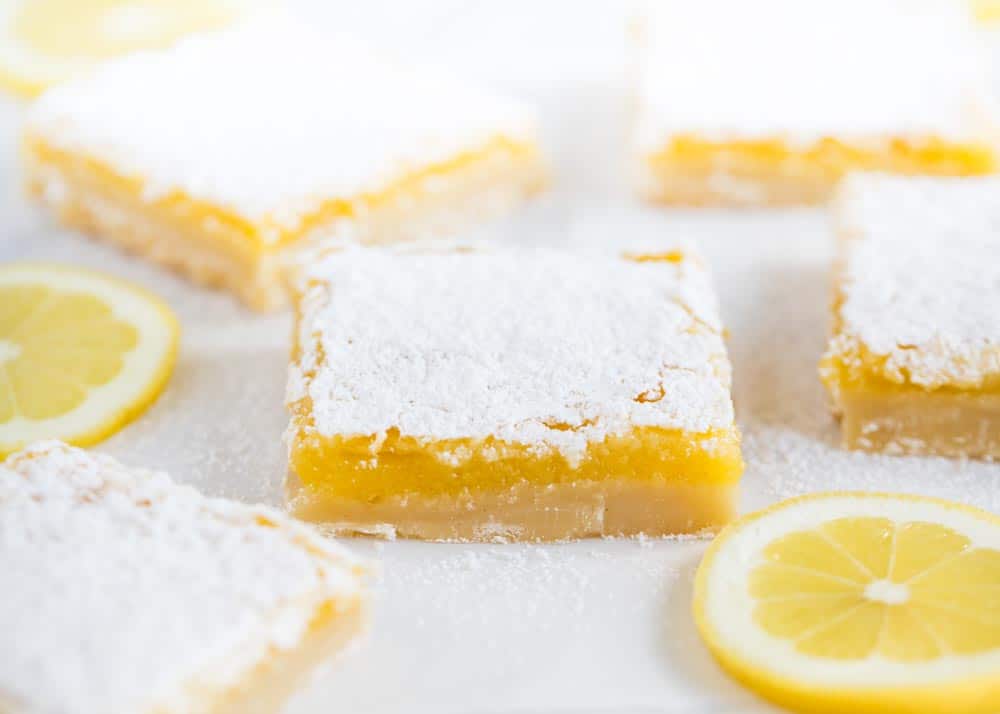
These lemon bars are easy to make with a buttery shortbread crust and vibrant lemon filling. It’s a refreshing homemade dessert bar that is the best of both sweet and tart taste!
Crowd-pleasing dessert bar recipes are perfect for any gathering! Others that we love to make include strawberry pretzel salad, cheesecake bars and pecan pie bars.
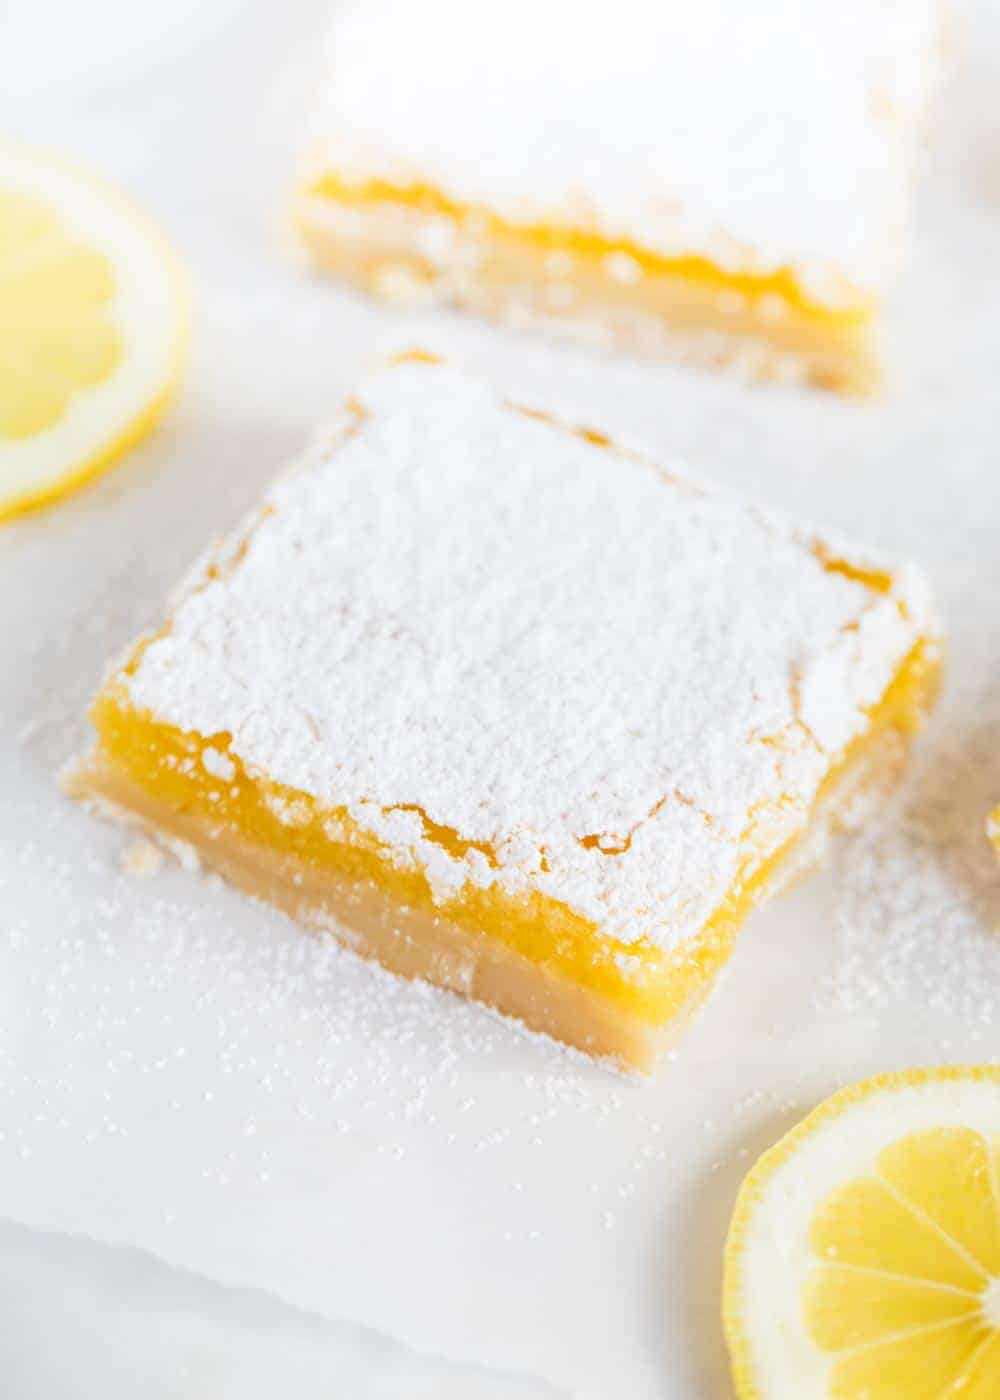
Table of Contents
Lemon Squares
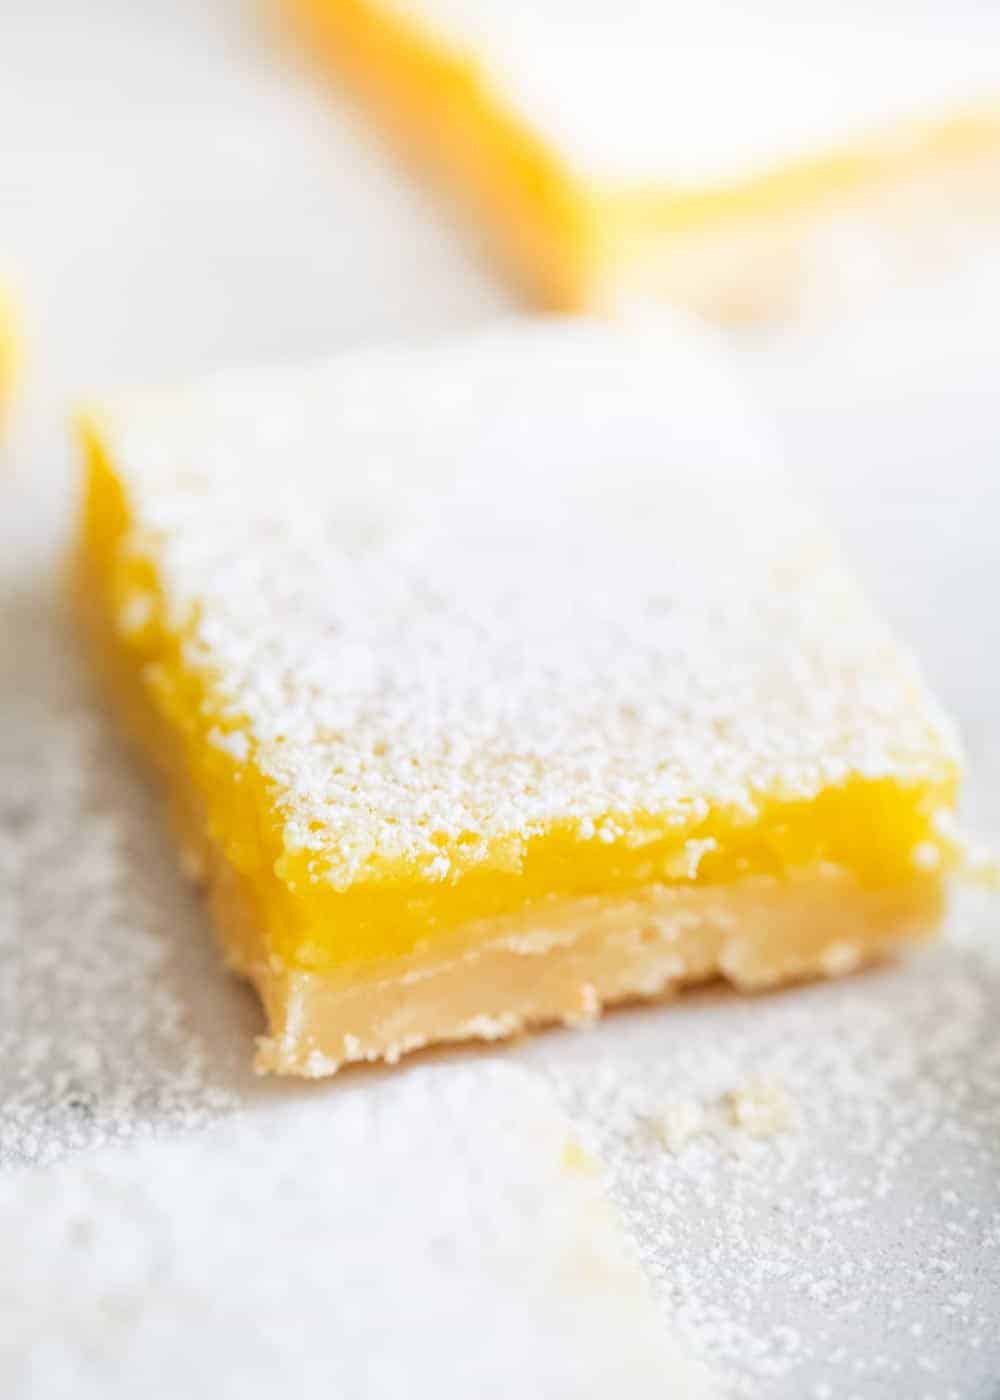
I’ve made these easy lemon bars for several years now and they are always a huge hit. They have a rich buttery crust, a zesty lemon filling and are finished off with a dusting of sweet powdered sugar.
I have to admit that lemon bars are not usually the first dessert recipe I think to make but my when I do my family goes crazy over this or my lemon meringue pie, these lemon brownies and this lemon sugar cookies recipe!
Ingredients
Here are the key 5 ingredients in this lemon bar recipe.
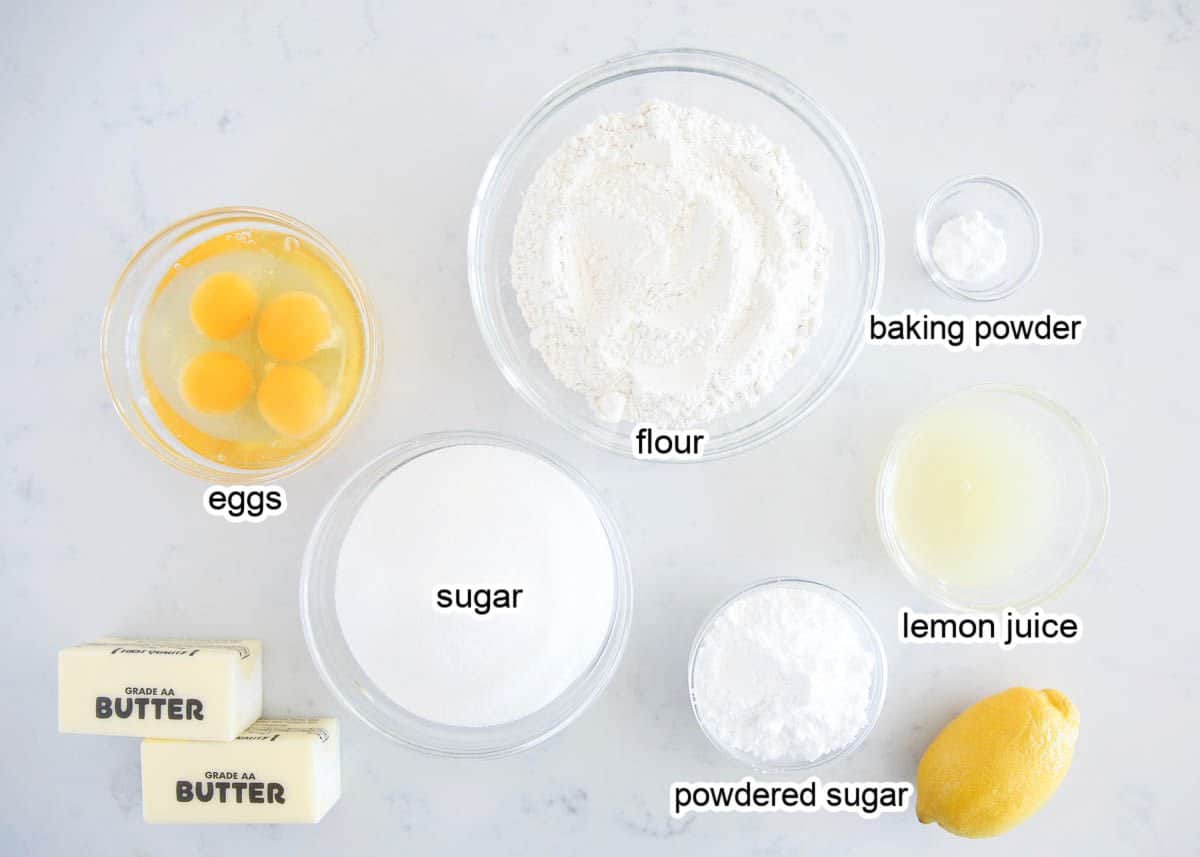
- Butter. I love to use salted butter in this recipe to help cut the sweetness. If you use unsalted butter, feel free to add in a pinch of salt.
- Powdered sugar. Also known as confectioner’s sugar. You’ll use it in the crust and for sprinkling over top.
- Flour. I like to use all-purpose flour for this recipe.
- Eggs. Make sure to use fresh eggs.
- Lemon. Pick a nice ripe lemon. You’ll use the fresh lemon juice and zest to give these bars delicious flavor. Learn how to zest a lemon a few different ways.
How to Make Lemon Bars
It’s easier than you think to make homemade lemon squares!
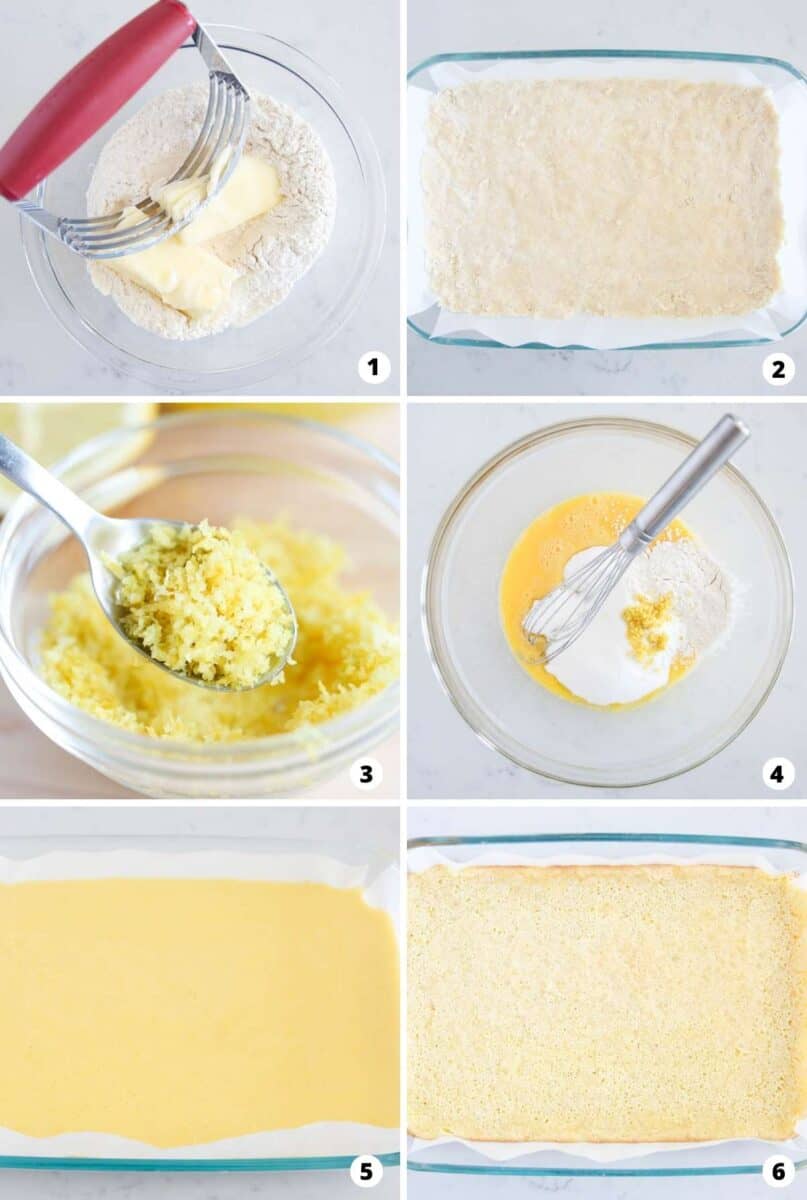
- Shortbread crust: These bars start with the most perfect shortbread cookie crust. It’s super soft and delicious with a rich, buttery flavor. It’s made with a simple mixture of butter, powdered sugar and flour and is baked until firm (but not brown).
- Lemon filling: Next comes the sweet lemon filling. It has double the lemon flavor (zest + juice) and is super bright and refreshing. It solidifies once cool, but still remains a little gooey (but not runny). If you love all things lemon, this filling will be no exception.
- Bake and chill. Bake 20 minutes, or until the filling is firm and no longer jiggles, watching closely so the filling doesn’t brown. Let cool. Place in the refrigerator at least 1 to 2 hours before serving.
- Powdered sugar: This layer is optional, but it definitely makes a difference in taste. It finishes the bars off with the perfect hint of sweetness. I like to use a sugar shaker (or fine mesh strainer) to sprinkle powdered sugar evenly over the top.
Add a Coconut Twist!
For a fun twist to the lemon bars, add in some unsweetened shredded coconut like I did with these lemon coconut bars. You can add it into the shortbread crust, as well as on top of the lemon filling for a robust coconut flavor.
Baking Tips
- Lemons. Make sure to use REAL fresh lemons for this recipe to get the best flavor. It definitely makes all the difference. If you prefer a more tart lemon flavor, add 1 Tablespoon lemon zest in the filling (instead of 1/2 Tablespoon).
- Don’t overbake the crust. Bake the dough until firm, but not brown. It may seem a little underdone when you take it out of the oven, but it will continue to firm up as it cools. If it browns while in the oven, it won’t be as soft and tender.
- Don’t let the filling brown. Keep a close eye on the filling and make sure not to let it brown. The top of the filling can crack if it is overbaked. As soon as the filling is no longer jiggly, remove it from the oven. It will continue to set up as it cools.
- Let cool completely. This is one of those desserts that needs to cool completely before enjoying. As tempting as it is to sneak a bite right out of the oven, don’t do it! The filling needs time to set and the bars will need to chill in the fridge for a few hours. Trust me, they taste best cold!
- Air bubbles. A few air bubbles on top of the filling is completely normal, so don’t panic! The air from mixing the eggs rises to the surface, creating small air bubbles.
- Smaller batch. You can cut the recipe in half and make the bars in a smaller 9×9″ baking pan if preferred. Use the same oven temperature, but bake both the crust and filling a few minutes less than called for. Make sure to keep an eye on both so that they don’t brown.
5 star review
“OMG!!! These were absolutely fabulous! I made them for my niece’s birthday party. I used the full tablespoon of lemon zest. Everyone loved them. Very, very addicting!”
– Joan
Storing, Freezing + Make-Ahead
- Storing: Lemon bars will taste fresh for up to 3 days in the refrigerator as long as they are stored in an airtight container.
- Freezing: I usually freeze half the batch since the recipe makes quite a few. They freeze great once cut into squares and then placed in a covered Tupperware container. I like to place a piece of parchment or wax paper between the layers to avoid sticking.
- Make-ahead: These lemon bars are a great make-ahead treat since they need time to chill in the fridge anyways in order to set before serving. Prepare as directed, then cover and store in the fridge until ready to serve.
FAQs
This is often a sign of overbaking your lemon bars. You don’t want the filling to brown, so make sure to keep on eye on them as they bake.
When you jiggle the pan from side to side, the filling should no longer jiggle in the center. If it still looks a little loose and runny, continue baking and test again.
Once you remove the bars from the oven, it’s important to let them chill in the refrigerator for 1-2 hours so that the filling sets up completely after cooling. If you try to cut them too soon, the filling will still be loose.
There’s nothing worse than creating a gooey mess when slicing lemon bars. For a clean cut, run a sharp knife under water, dry it off and then slice your first row. Clean the residue off the knife and repeat these steps until complete.
Although I haven’t tried making a gluten-free version myself, you can substitute all-purpose flour for a gluten-free 1:1 baking flour and achieve similar results.
Love lemon desserts? Try this raspberry cookie recipe with lemon glaze, lemon and poppy seed bread, lemon blueberry cupcakes or lemon icebox pie!
More Easy Spring Desserts
Browse allBelow are a few of our other favorite Spring desserts that are so delicious and easy to make!
HUNGRY FOR MORE? Subscribe to my newsletter and follow on Facebook, Pinterest and Instagram for all the newest recipes!
The Best Lemon Bars
Video
Ingredients
Crust
- 1 cup (226 grams) salted butter , at room temperature
- ½ cup (50 grams) powdered sugar , can sub with granulated sugar
- 2 cups (260 grams) all-purpose flour
Lemon Filling
- 4 large eggs
- 1 ¾ cups (350 grams) granulated sugar
- ¼ cup (32 grams) all-purpose flour
- ⅓ cup fresh squeezed lemon juice , about 3 lemons
- ½ Tablespoon lemon zest
- ½ teaspoon baking powder
- Powdered sugar , to sprinkle on top
Instructions
Crust
- Preheat the oven to 350°F. Line a 9×13-inch glass pan with parchment paper.
- In a medium sized bowl, mix together the butter, sugar, and flour with a pastry cutter or mixer.
- Press evenly into the bottom of the pan. Bake 15 to 20 minutes, or a toothpick inserted into the center comes clean. Be careful not to brown.
Lemon Filling
- In a medium bowl, whisk the eggs. Whisk in the sugar, flour, lemon juice, lemon zest and baking powder until smooth and combined. Pour over the baked crust.
- Bake 20 minutes, or until the filling is firm and no longer jiggles, watching closely so the filling doesn't brown. Let cool. Place in the refrigerator at least 1 to 2 hours before serving.
- Once cooled, sprinkle with fresh powdered sugar and cut into 24 bars.
Notes
Nutrition
Nutrition provided is an estimate. It will vary based on specific ingredients used.
Did you make this recipe? Don’t forget to give it a star rating below!








Sounds perfect for a graduation party. No bakery goods allowed. Peanut allergy.. Will make about 3 batches. thanks.
Glad you found something that will be allergy-friendly for the party! Congrats to the graduate!
Fabulous!
I made these last night, trying to do something with the tart unsweetened cranberry juice in the fridge. While I would use less sugar next time, the bars are great!! I also put almond flour in the crust, which was delicious. I was shocked at a non- precooked filling setting up so well as I’ve had issues with lemon bars being runny in the past, so this is a really resilient recipe. I’ll be making it again!
I’m glad to hear you enjoyed the bars :)
I plan to make these for company in a couple days. But I am wondering if it is necessary to use 1 3/4 cup of sugar to make the filling thicken, or can I use less? It seems like an awful lot of sugar, especially if topped with powdered sugar. I usually cut back on cookie recipes to make them less sweet. Please let me know. Thanks!
Hi Jane, I haven’t tried – although I think you could probably use less sugar if preferred. Let me know how it goes if you give it a shot!
I used 1/2 cup less sugar in the filling. They were delicious. And adding unsweetened coconut to the crust as well as having it on top with the powdered sugar was a great touch. I kept mine in the fridge – a refreshing Summer dessert – Thank you!
I’m so happy to hear it worked out for you, Jane! Thank you for sharing your substitutions :)
OMG!!! These were absolutely fabulous! I made them for my niece’s birthday party.
I used the full tablespoon of lemon zest. Everyone loved them. Very, very addicting!
Yay, I’m so glad they were a hit!!
These lemon bars are so flavourful and easy to make! Thanks for sharing the recipe!
I’m so glad you enjoyed them :)
I only have unsalted butter, is ok to use for the crust? Could I a bit of salt?
Sure! I like to add in 1/4 teaspoon salt for every 1 stick of butter (there are 2 sticks of butter in this recipe, so I’d in about 1/2 teaspoon).
These really are the BEST lemon bars! Amazing flavor and texture–definitely a new family favorite. :D
I’m so happy to hear that you enjoyed them, Elizabeth!
I absolutely love making lemon desserts in the spring and summer. These lemon bars are bursting with lemon flavor! SO GOOD! Can’t wait to make them again!
Yay! So glad they were a hit, Alison!
Oh my do these look and sound amazing! I really like that I can make a smaller batch too.
OMG I LOVE THIS RECIPE!! I TRIED IT ALL IT WAS TOOO GOOD!! 😍😍😀
Delicious!! Mine were a little thick because my pan was smaller than called for so who knows how much better they might be if they were a little thinner. I love lemon and might use a little more zest next time to make them even more delicious!!!
I’m so happy to hear you enjoyed them! Thank you for your comment! :)
Did this used to have 2.25 cups sugar? Or more sugar in general?
It ends up being about 2.25 cups if you include the powdered sugar.
These lemon squares are perfect – thank you for this recipe.
You’re welcome! I’m so glad you enjoyed them! :)
I love them, will be my go to for my lemon fix, will definitely make again
I’m so glad you enjoyed them! :)
Hi I wanna try your recipe but i don’t have salted butter so can I just use unsalted and add some salt.
Yes, that should be fine! :)
Tasted great but — the lemon topping cracked why ??
I’ve had trouble with the top cracking if I over bake it. Maybe decrease the time a little bit next time.
Ok, the recipe said nothing about lemon zest or how much but the instructions calls for it. How much? Zest 3 lemons??
1/2 Tb lemon zest.
Can they be made gluten free?
Hi Lisa! I haven’t tried it but I think it would work!!